How to install the Active Directory PowerShell module on Windows Server, Windows 11 and Windows 10
October 29, 2021
The Active Directory Module for Windows PowerShell is one of the main tools for domain administration, managing objects in Active Directory, and getting various information about AD computers, users, groups, etc. Any Windows administrator should know how to use AD as a graphical snap-in (usually These are ADUC – Active Directory Users & Computers) and RSAT-AD-PowerShell cmdlets for performing day-to-day Active Directory administration tasks. In this article, we'll take a look at how to install the Active Directory PowerShell module on Windows.
How to install Powershell Active Directory Module on Windows Server
On Windows Server 2016, 2019 and 2022, you can install AD Module for PowerShell from Server Manager: Add Roles and Features → Features → Remote Server Administration Tools → Role Administration Tools → AD DS and AD LDS Tools → Active Directory module for Windows PowerShell.
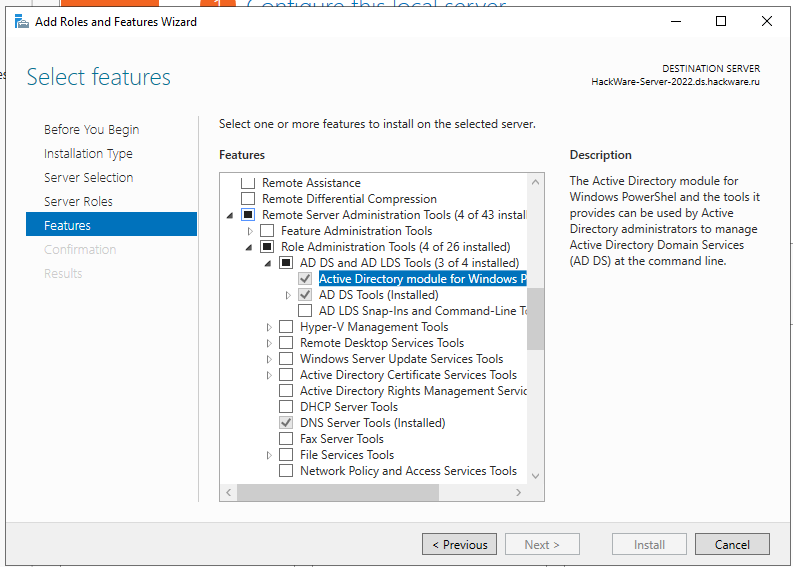
If you have already installed the Active Directory Domain Services role, this means that the Active Directory Powershell module is already activated and no additional action is required.
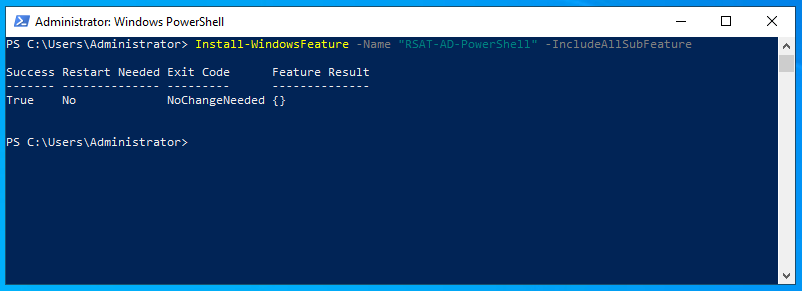
You can also install the module from the PowerShell console using the command:
Install-WindowsFeature -Name "RSAT-AD-PowerShell" -IncludeAllSubFeature
How to Install Active Directory PowerShell Module on Windows 11 and Windows 10 in command line
You can install the RSAT-AD-PowerShell module not only on Windows Server, but also on your workstations.
On Windows 11 or Windows 10, run this PowerShell command to install the Active Directory module:
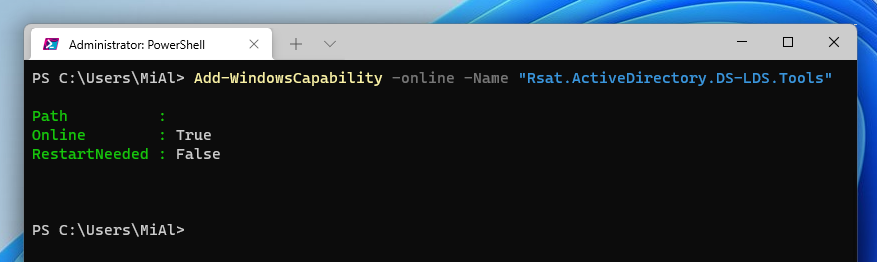
Add-WindowsCapability -online -Name "Rsat.ActiveDirectory.DS-LDS.Tools"
The previous command must be executed in the command line with administrator rights.
Related article: PowerShell with administrator rights: how to run and verify
How to install Active Directory PowerShell module in Windows 11 in a GUI
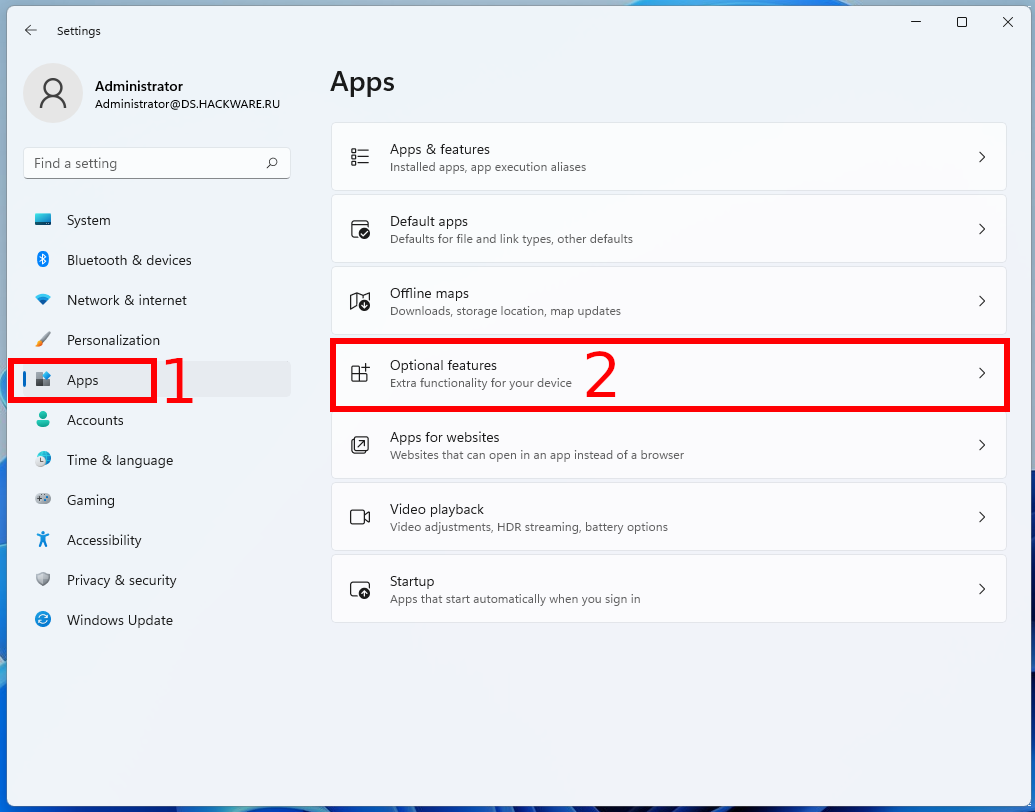
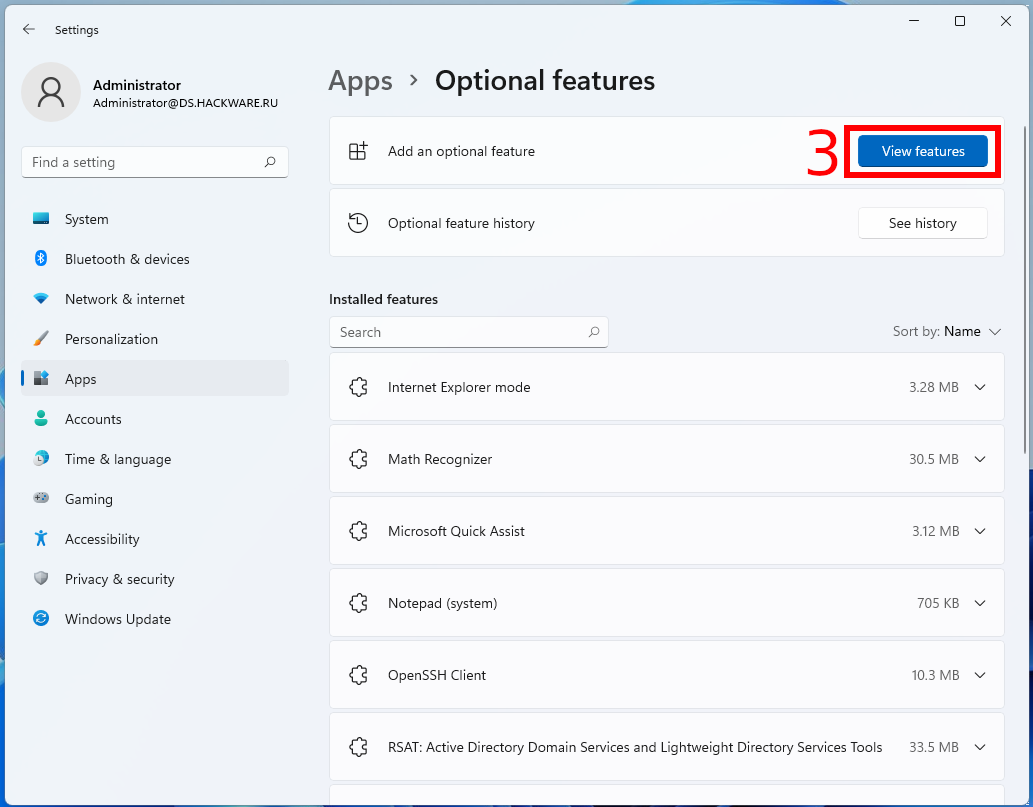
To install the Active Directory PowerShell module in Windows 11 using a GUI, open “Settings” by pressing Win+i and select the “Apps” tab, then go to “Optional Features”.
Now select “View features” under “Add an optional feature”.
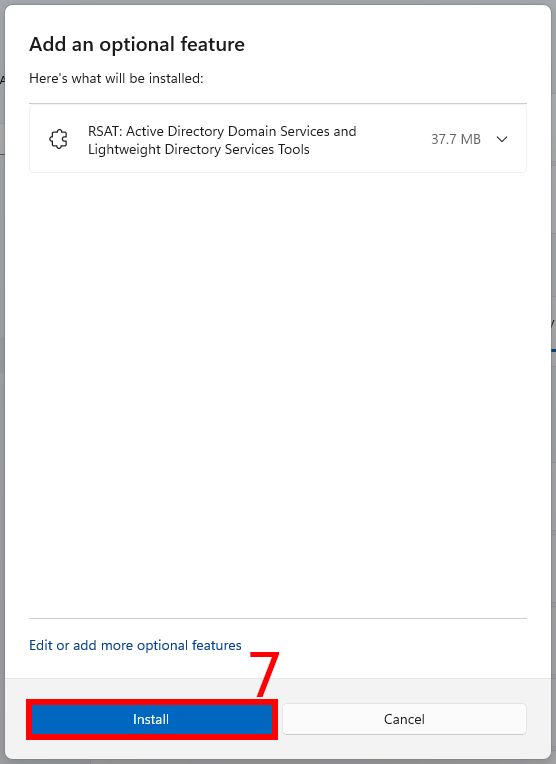
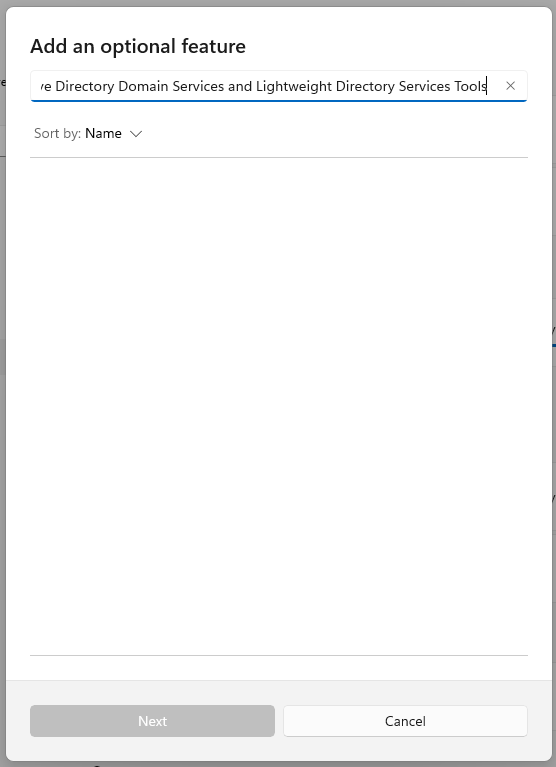
To install the Active Directory Remote Administration Tools, search for “RSAT: Active Directory Domain Services and Lightweight Directory Services Tools”, check the box and click “Next”,

then click “Install”.
Note: if, when searching for a particular component, you cannot find it, then, probably, this component is already installed.
To verify this, in the search bar under “Installed features” enter the name of the component you are looking for.
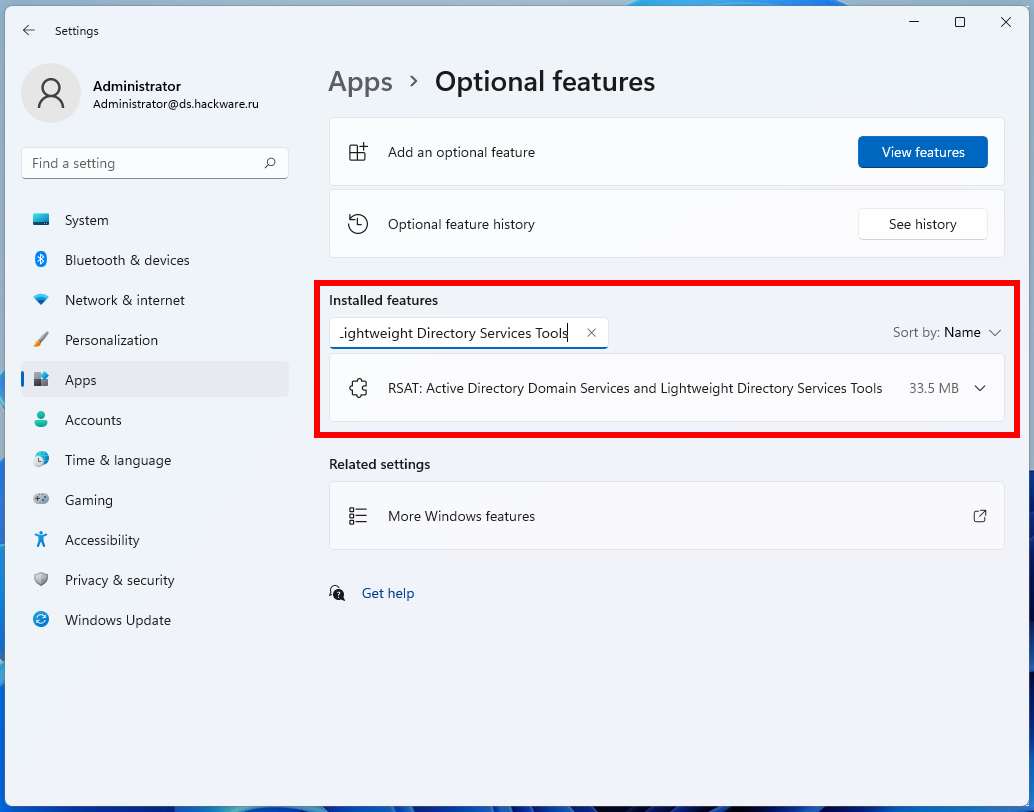
Also, remember that English and localized versions of Windows have different names for these components!
How to Install Active Directory PowerShell Module on Windows 10 in using a GUI
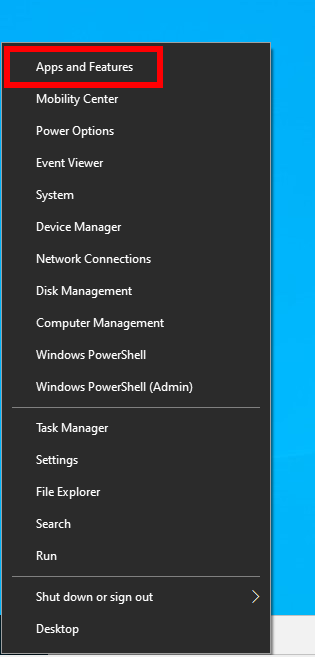
To install the Active Directory PowerShell module in the GUI, press Win+x, then select “Apps and Features” from the menu that opens.
Next, select “Optional Features”.
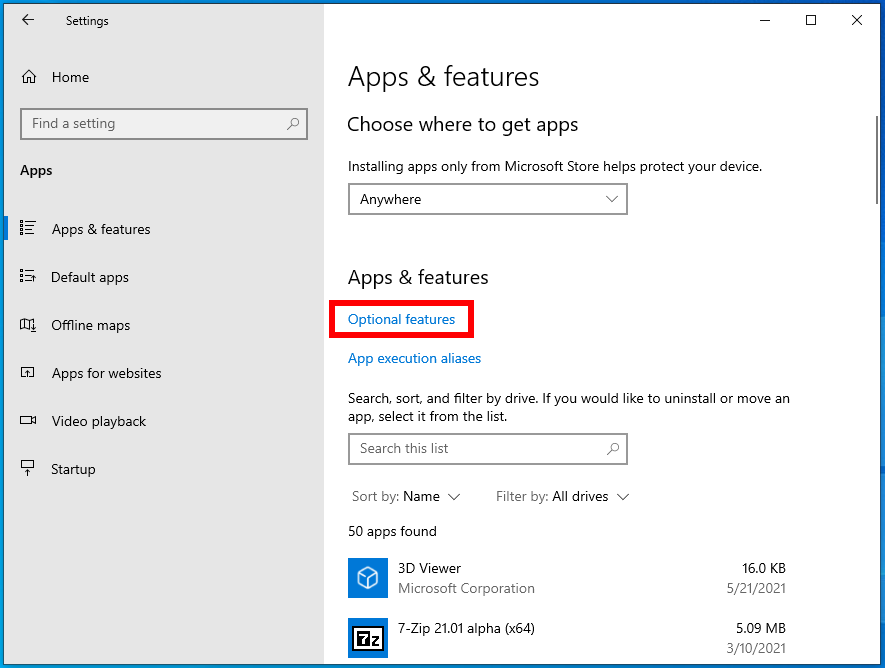
Now select “Add a feature”.

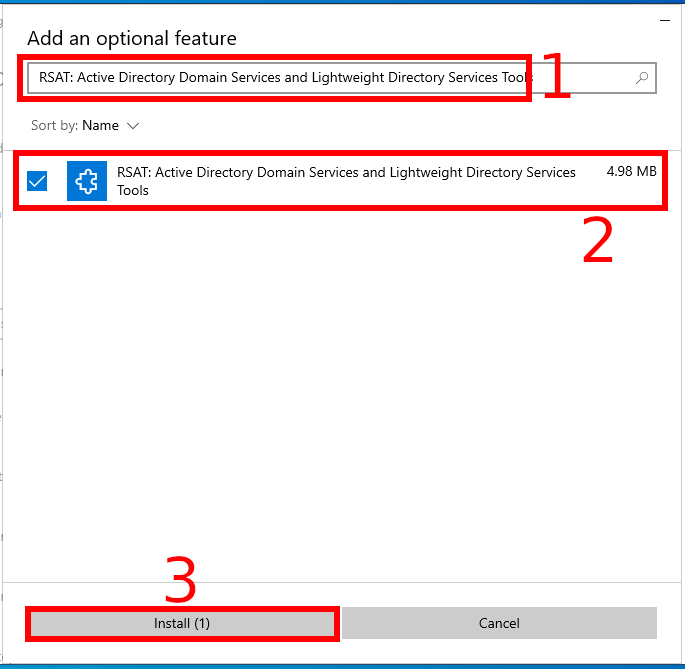
To install the Active Directory Remote Administration Tools, select “RSAT: Active Directory Domain Services and Lightweight Directory Services Tools” and click the “Install” button.
Related articles:
- How to connect a computer to the Internet via Bluetooth in Windows (77.5%)
- Demote Domain Controllers in Windows Server in PowerShell and GUI (72.5%)
- What is Windows Admin Center and do regular users need it? (70%)
- How to install Windows Server (Desktop Experience) 2022 (70%)
- How to install Windows Server Core 2022 (70%)
- How to increase the color (saturation) of images, how to make a photo warmer or colder (RANDOM - 50%)