
How to boot into VirtualBox from USB
November 11, 2021
In this post I will tell you how to connect a USB disk (or USB flash drive) to a virtual machine so that the guest system treats it like a regular hard disk.
This trick will allow you not only to boot from the installation USB – which is rather pointless. If you connect a USB disk or flash drive to the guest system as a regular disk, you can do such interesting things as:
- boot from physical SATA disk via USB adapter
- install Windows on a USB disk or flash drive
If you do not have the ability to connect a SATA disk directly to a computer – for example, to a laptop – but you really need to boot into the operating system that is deployed on it, then the trick described here will help you do this: plug the SATA disk to the computer via a USB adapter, and then connect the USB disk to the virtual machine as a regular disk, as shown in this guide.
Regarding the second point – installing Windows on a USB drive – if you want to install Linux on a USB flash drive (not to write a Live image, but to install a full-fledged system), then you do not have to do the trick shown here to install it – since Linux is perfectly installed on a portable media. But in Windows there is a prohibition for installation on USB disks and flash drives.
I will show you how to boot from USB on Windows and Linux. The principle is the same in both of these operating systems, but the commands differ slightly due to the specifics of the OS.
How to Boot into VirtualBox from USB on Windows
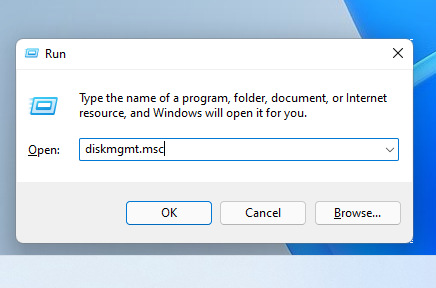
Plug a USB flash drive or disk to your computer. Then press Win+r and execute diskmgmt.msc.
Find your USB flash drive and remember the disk number:
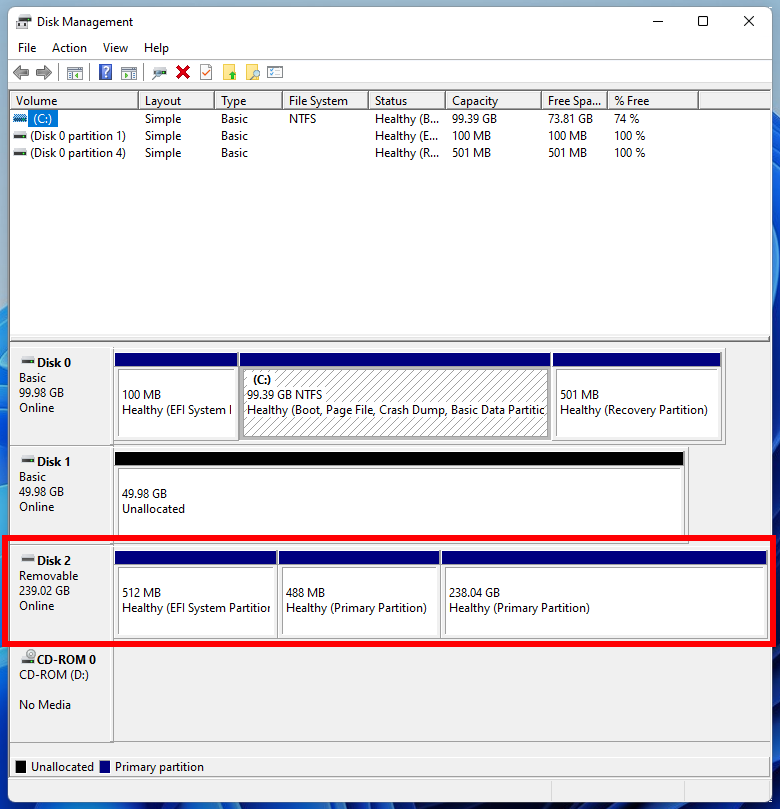
For example, in my screenshot, the flash drive has the number 2.
Close all VirtualBox windows if they are open.
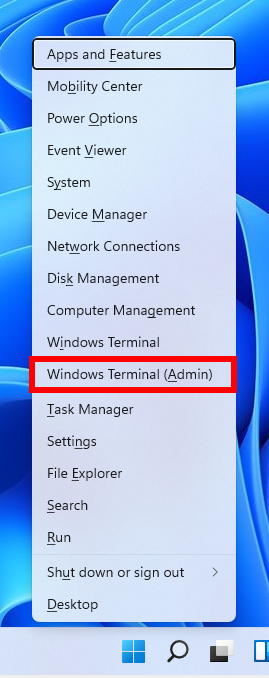
Next, we need to open a command prompt as administrator. To do this, press Win+x and select “Windows PowerShell (Admin)”.
Now go to the folder where you have VirtualBox installed. If this program is installed in the default directory, then the command to go:
cd $Env:programfiles\Oracle\VirtualBox
If you chose a different location for VirtualBox, then edit the previous command accordingly.
Now, in the command line, paste the following command, in which replace # with the disk number that we looked at just above, then press Enter:
.\VBoxManage internalcommands createrawvmdk -filename C:\usb.vmdk -rawdisk \\.\PhysicalDrive#
For example, I have this second disk, then the command looks like this:
.\VBoxManage internalcommands createrawvmdk -filename C:\usb.vmdk -rawdisk \\.\PhysicalDrive2
If everything went well, the following message should appear:
RAW host disk access VMDK file C:\usb.vmdk created successfully.
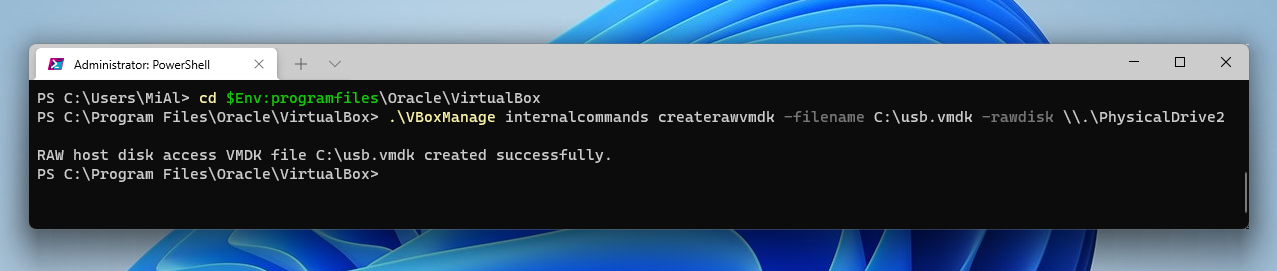
Note that you can replace C:\ usb.vmdk with any file location you want.
This command creates a virtual machine disk file (VMDK) pointing to the physical disk you selected. When you use a VMDK file as a disk in VirtualBox, then VirtualBox will actually have access to the physical disk.
Now open VirtualBox as administrator - this is a must, otherwise it will not work as it should. To do this, click the Start button, type in “VirtualBox” and select “Run as administrator”:
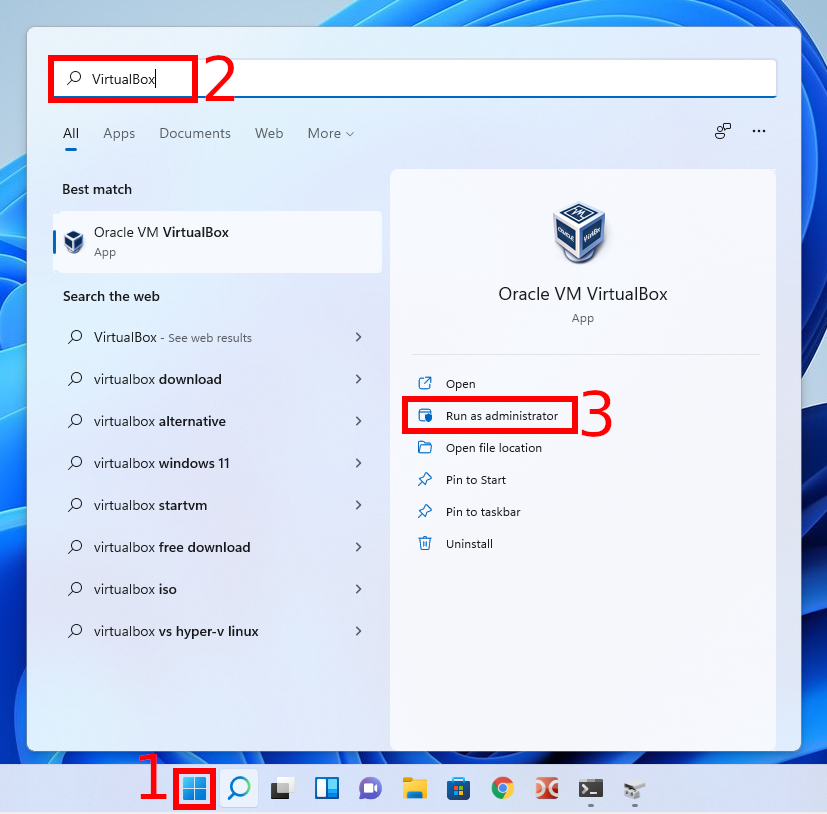
VirtualBox can only access raw disk devices with administrator privileges.
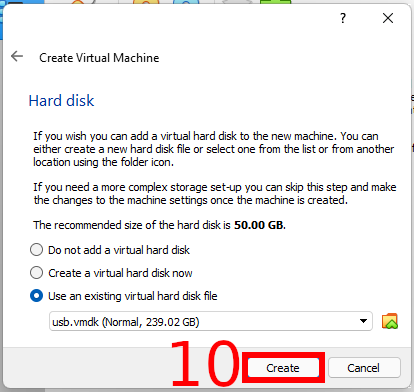
Now in VirtualBox create a new virtual machine, select the appropriate operating system and when it comes to choosing a hard disk, instead of creating a new one, select “Use an existing virtual hard disk file”:
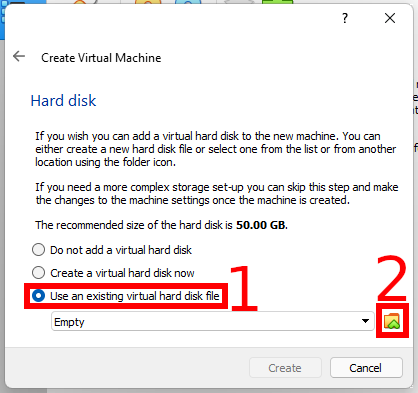
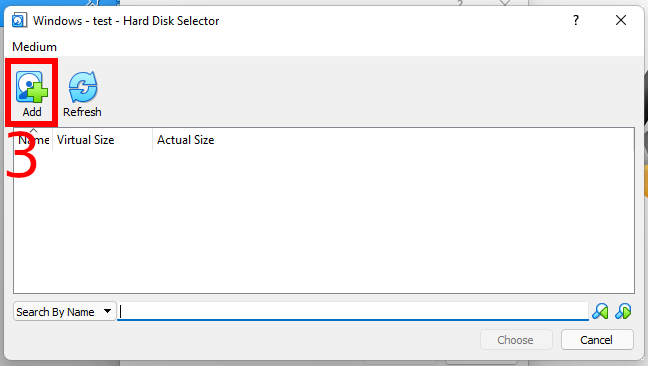
Click “Add”:
Now open the file C:\usb.vmdk (or another one if you saved it in a different location or under a different name):
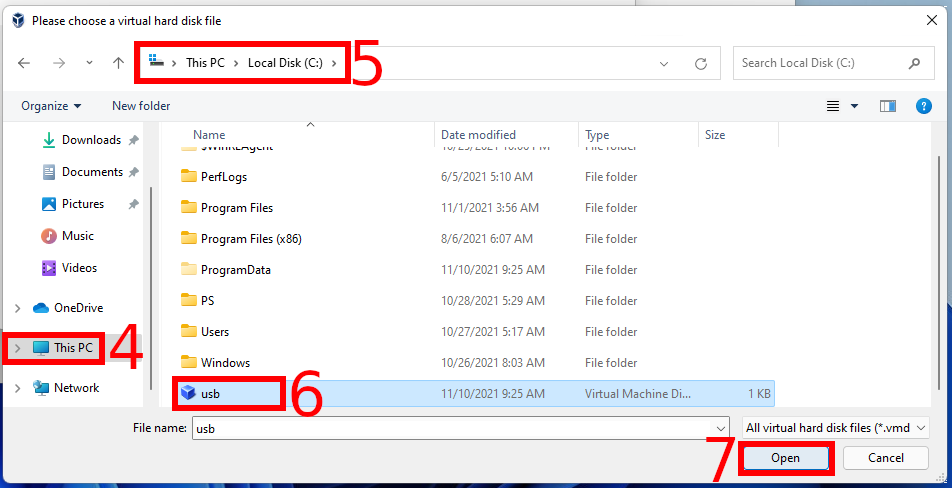
Choose it:

Press “Create” button:
Boot your virtual machine, now it should see your USB flash drive as an ordinary hard drive. That is, if it is a correctly written boot disk or USB flash drive, then the system will boot from it.
Please note that the USB device must be the first hard drive in your VirtualBox virtual machine, otherwise it will not boot. If you are connecting a new USB disk to an existing machine, then try changing the order of the media in the settings of this machine, or select the appropriate disk at the beginning of the boot.
How to Boot into VirtualBox from USB in Linux
To understand the principle, read the previous section on Windows.
To do without root rights in Linux, you need to add the user (yourself) to the “disk” group:
sudo usermod -a -G disk $USER
Then reboot.
If you do not add yourself to the “disk” group, then you will need to run VirtualBox as root or with sudo, otherwise you will encounter an error:
VD: error VERR_ACCESS_DENIED opening image file '/home/mial/VirtualBox VMs/usb.vmdk' (VERR_ACCESS_DENIED).
On Linux, to find out the name of the USB drive, run the command:
sudo fdisk -l
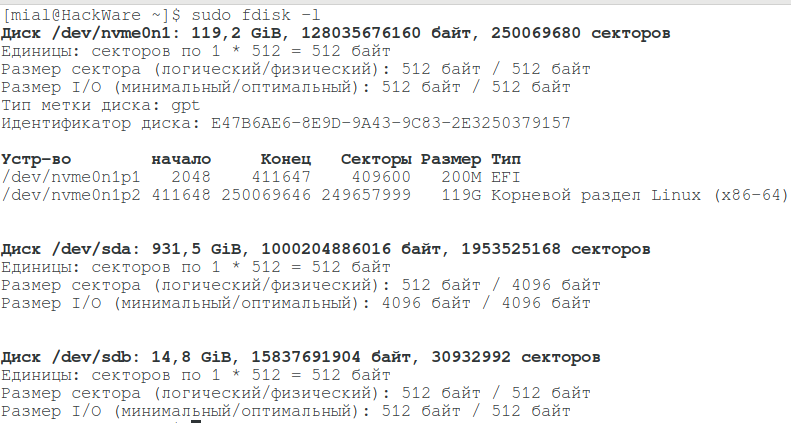
In my case, the disk name is /dev/sdb.
To create a virtual disk file pointing to a real disk, run a command like this:
VBoxManage internalcommands createrawvmdk -filename '~/VirtualBox VMs/usb.vmdk' -rawdisk /dev/sdX
Where, instead of X, write the letter of the corresponding drive. An example for my conditions:
sudo VBoxManage internalcommands createrawvmdk -filename '~/VirtualBox VMs/usb.vmdk' -rawdisk /dev/sdb
In this command, you can replace '~/VirtualBox VMs/usb.vmdk' with a different location of your choice.
Everything else – creating a virtual machine and choosing an existing virtual disk as a hard disk – just like in Windows.
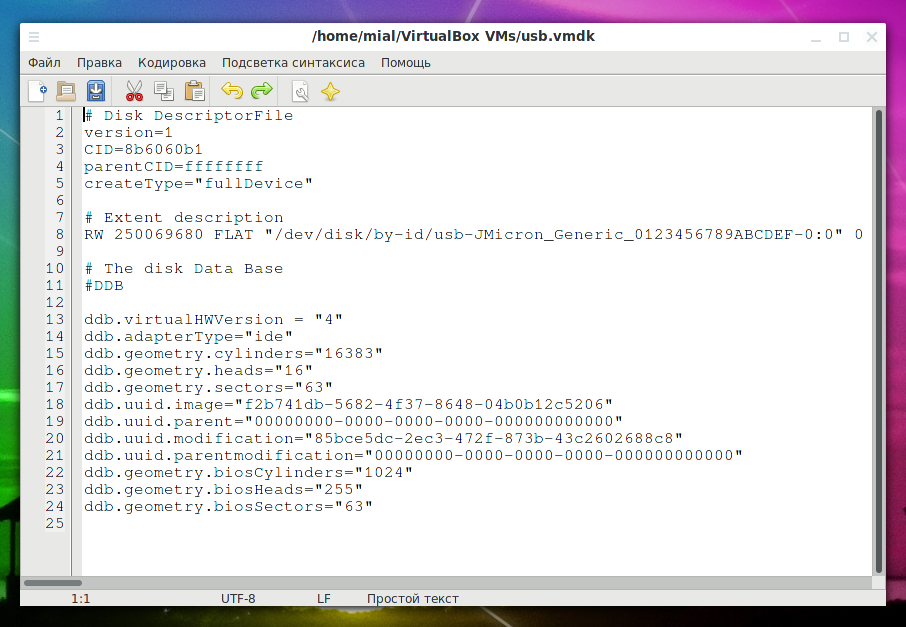
Note that the usb.vmdk file is a simple text file that you can move to any location and even edit.
Instead of a name like /dev/sdX, you can use a by-id based persistent name, for example:
VBoxManage internalcommands createrawvmdk -filename flash.vmdk -rawdisk '/dev/disk/by-id/usb-Samsung_Flash_Drive_0325121050019952-0:0'
This will allow you to avoid an unavailable disk error if its name changes. See the article “Persistent names for block devices” for details.
Related articles:
- UEFI does not see installed Linux (SOLVED) (71.2%)
- How to determine the type and functions of USB Type-C: charging, connecting to a monitor, Thunderbolt (61.6%)
- How to install VirtualBox Guest Additions in Linux LMDE (55.7%)
- How to recover metadata in processed photos (54.1%)
- All about MAC addresses: what are they for, how to view and find out the manufacturer by MAC address (54.1%)
- What are PC and AV modes in monitor settings. Better choose PC or AV for monitor (RANDOM - 50%)