How to manage VPN Settings in Cinnamon
November 25, 2021
The Cinnamon desktop environment is primarily characteristic of Linux Mint.
Install NetworkManager VPN plugin for OpenVPN
In order for you to have the menu item shown in this manual in NetworkManager, you must have the NetworkManager VPN plugin for OpenVPN installed.
Some distributions have it installed by default. If you don't have it, run one of the following commands to install it.
- Installation on Debian and derivative distributions (Linux Mint, Ubuntu, Kali Linux and others):
sudo apt install network-manager-openvpn-gnome
- Installation on Arch Linux and derivative distributions (Manjaro, BlackArch and others):
sudo pacman -S networkmanager-openvpn
In order for the changes to take effect (for NetworkManager to start using the installed plugin), restart the NetworkManager service with the following command:
sudo systemctl restart NetworkManager
Network Connections and Network Settings in Cinnamon
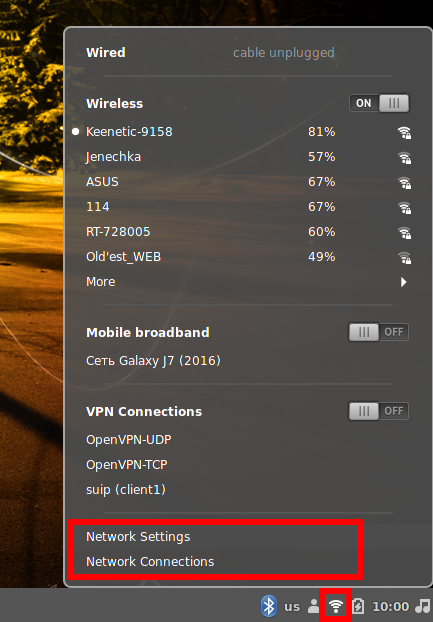
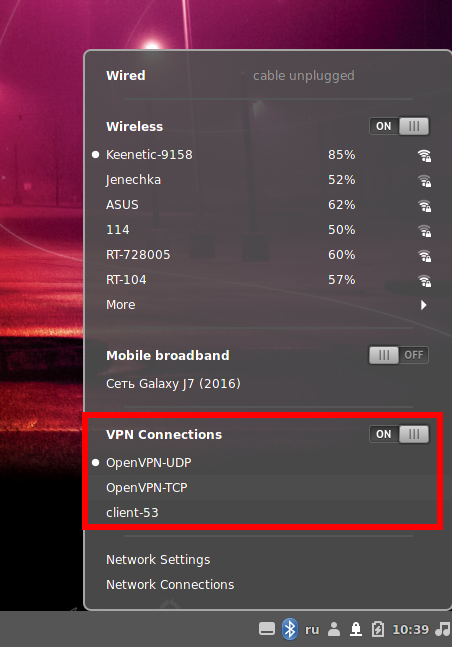
When you click on the network connection icon (its appearance depends on whether you are using a wired or wireless connection), two options will be available to manage networks:
- Network Settings – featured by Cinnamon (therefore, it is present only in this desktop environment)
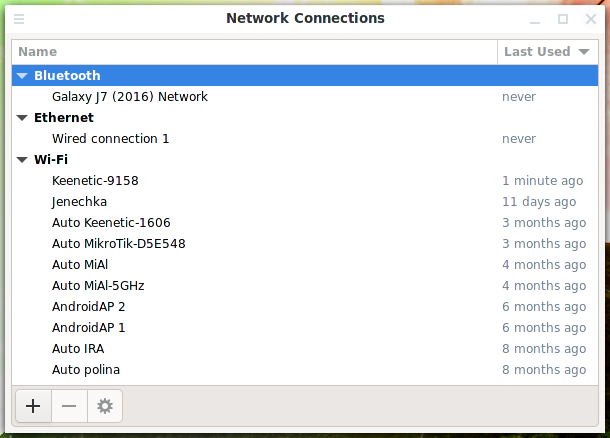
- Network Connections – featured by NetworkManager (hence, it is present in any distribution with NetworkManager)
In general, these settings allow you to do the same things: add, edit and remove network connections.
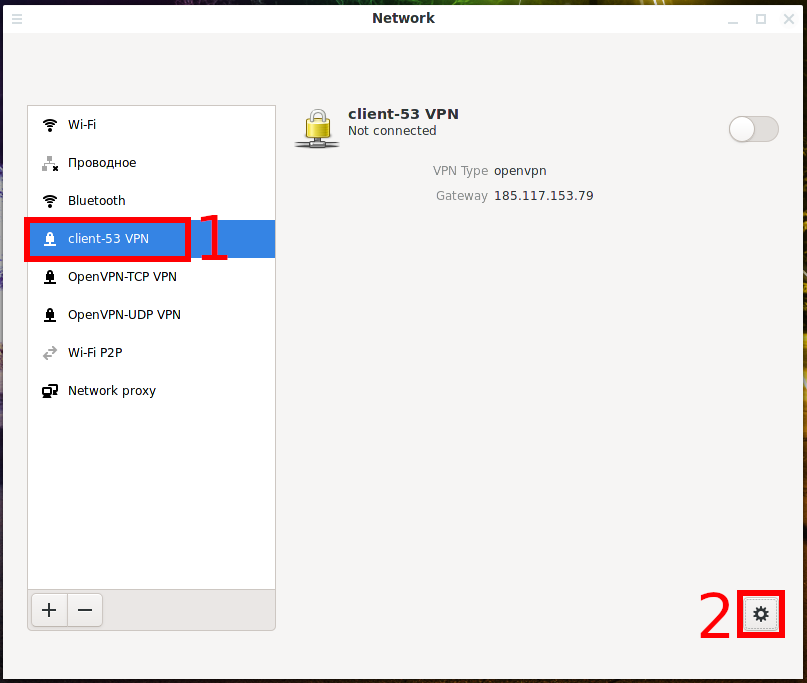
Network Settings contains a list of Wi-Fi networks available for connection, as well as a list of OpenVPN settings, proxies, wired connections. In Network Settings, you can activate a particular network connection.
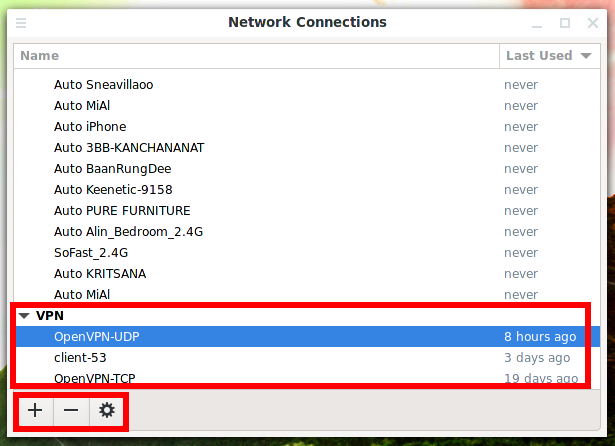
Network Connections does not show Wi-Fi networks available for connection, but it stores the settings of the networks to which the computer has ever connected.
Managing OpenVPN Connections in Network Settings
To remove an OpenVPN connection, select it and click the minus sign (-).
The connection will be dropped without confirmation.
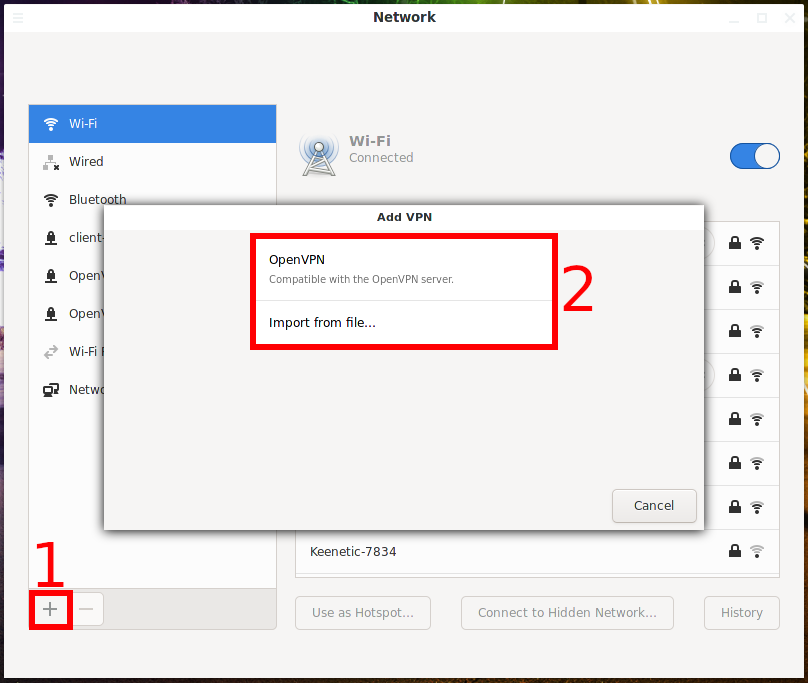
Click the plus sign (+) to add an OpenVPN connection.
You will be presented with 2 options:
- OpenVPN (compatible with the OpenVPN server) – you will need to enter the settings manually and specify the certificate files
- Import from file – import settings from an .ovpn file
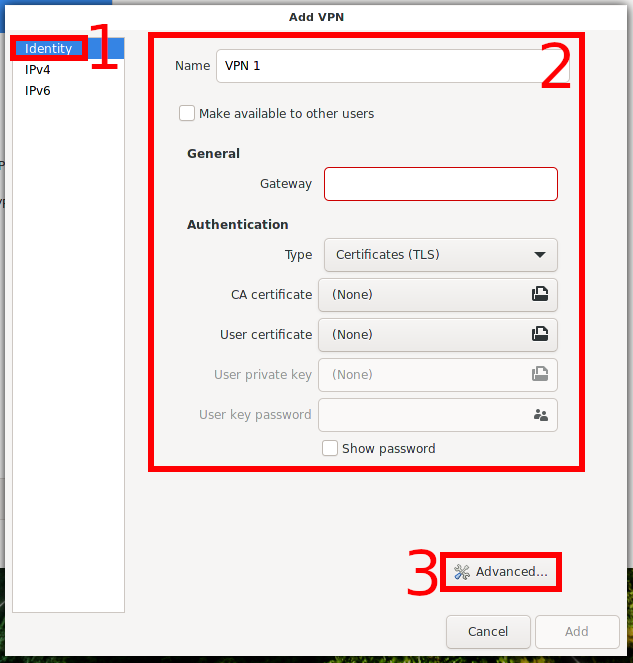
With manual configuration, you don't need to change anything in the “IPv4” and “IPv6” tabs. Some of the settings are located on the “Identity” tab, to access other settings, click the “Advanced” button:
To edit an OpenVPN connection, select it and click the gear icon.
Some of the settings are located on the “Identity” tab.
To access other settings, click the “Advanced” button.
Managing OpenVPN Connections in Network Connections
To remove an OpenVPN connection, select it and click the minus sign (-).
Click the plus sign (+) to add an OpenVPN connection.
In the drop-down list, you will have many options available, 2 of them are related to OpenVPN:
- OpenVPN – you will need to enter the settings manually and specify the certificate files
- Import a saved VPN configuration
With manual configuration, you do not need to change anything on the “General”, “Proxy”, “IPv4 Settings”, and “IPv6 Settings” tabs. Some of the settings are located on the “VPN” tab, to access other settings, click the “Advanced” button.
To edit an OpenVPN connection, select it and click the gear icon.
Connecting to OpenVPN server
You can add multiple OpenVPN connections and enable any of them depending on your needs. You can enable them as in the main NetworkManager panel – click on the selected connection:
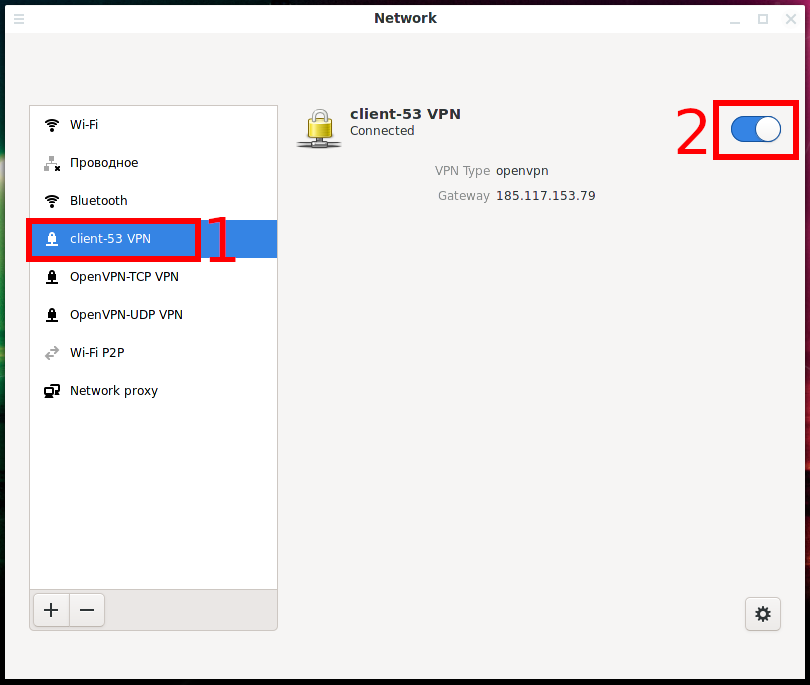
You can also enable VPN connections in Network Settings, to do this, select the desired VPN connection and click the switch:
Related articles:
- How to change configuration files when migrating from OpenVPN 2.4.* to OpenVPN 2.5.* (84.5%)
- How to use OpenVPN with TCP protocol (84.5%)
- Comparison of performance (data transfer rate) of OpenVPN over UDP and TCP (84.5%)
- Simultaneous use of multiple OpenVPNs on one server (84.5%)
- How to manage VPN Settings in Xfce (84.5%)
- How to update the GRUB bootloader in Arch Linux and derivatives (Manjaro, BlackArch) (RANDOM - 50%)
