How to modify images on the Linux command line
August 17, 2022
ImageMagick is a powerful program and library for creating and modifying images on the command line. This section will cover the commands and options that you can use to imitate a drawing with paints, pencil, charcoal, make an image black and white; rotate the image to an arbitrary angle or display the image horizontally or vertically; resize the image; add or reduce noise in the image; add a frame to the image; simulate 3D; add text with custom style and formatting; superimpose one image on another; apply other popular filters.
These examples are among the simplest cases of using ImageMagick on the command line to modify images, since most of them only require one option. More complex examples will be covered in the sections on creating new images and using ImageMagick scripts.
The “magick” utility is part of the ImageMagick package. For details on installing ImageMagick, including which dependencies you need to install to support the maximum number of formats, as well as a description of the command structure, examples of usage and all options, see the article: ImageMagick guide: installing, using, and troubleshooting.
Of course, you can do all the actions shown below in the image editor with a graphical user interface. Command line tools are especially effective when processing large numbers of images or when developing services.
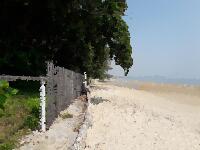
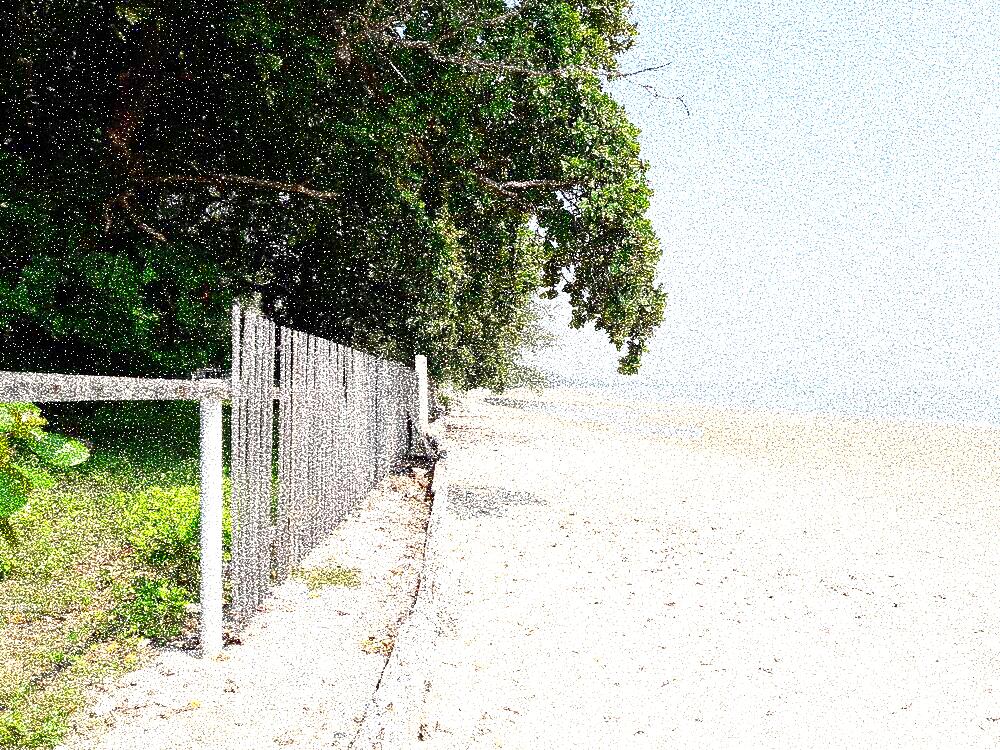
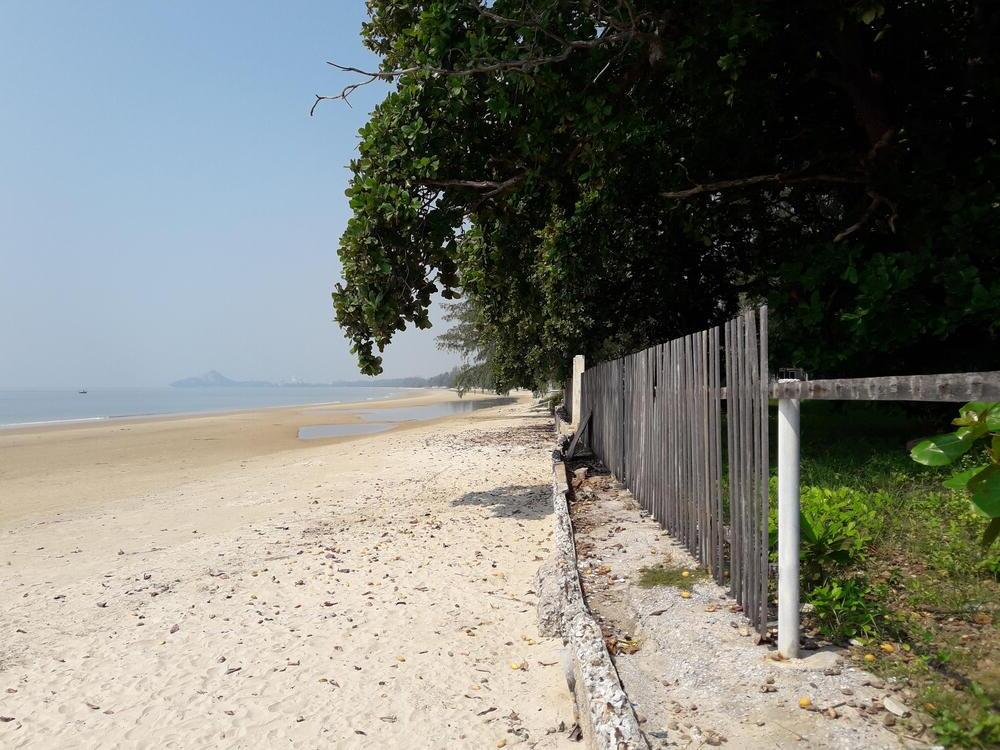
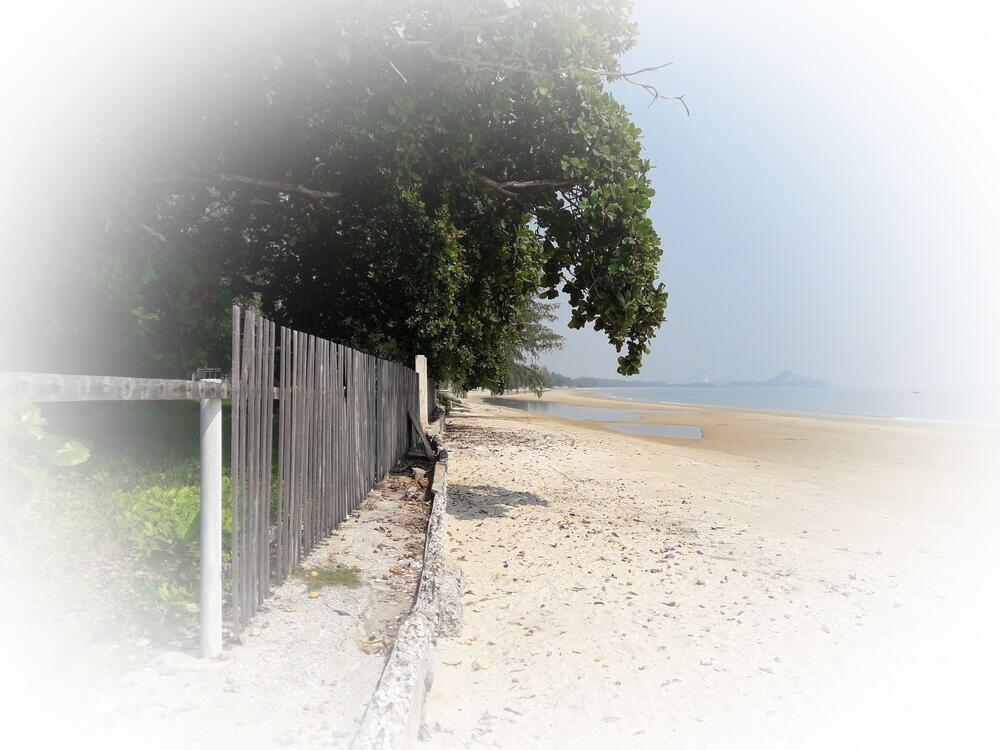
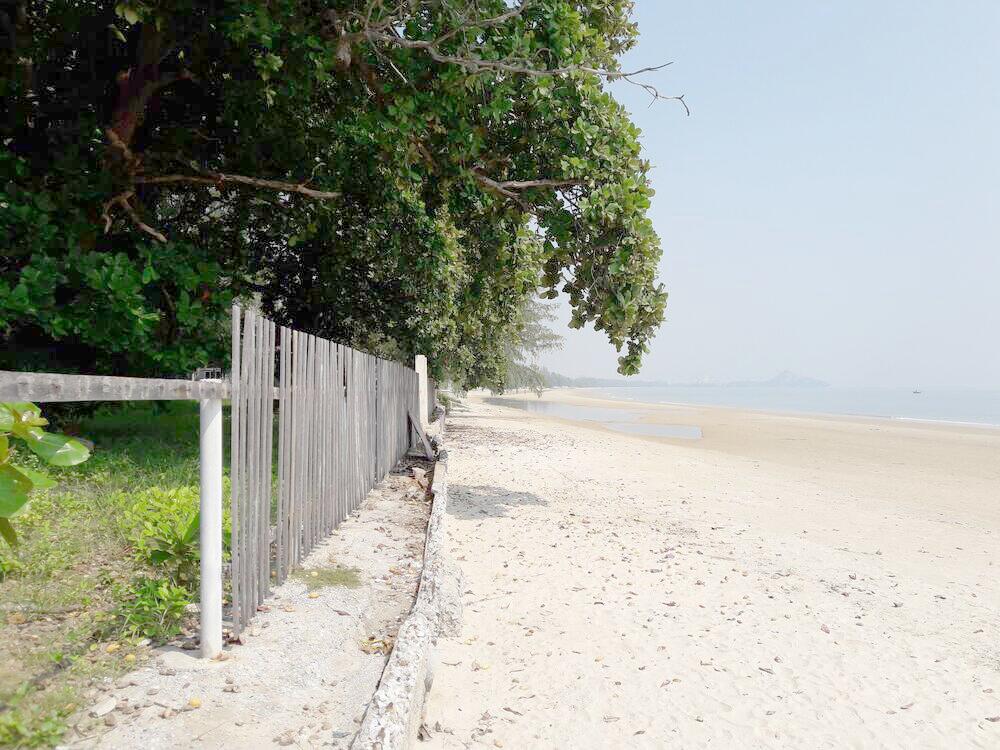
The following image will be taken as the source:

Combining ImageMagick options and actions
One ImageMagick (magick) command can perform several actions at once. Moreover, if you use formats like JPEG, that is, those that compress images with loss of quality (lossy), then try to reduce the number of operations (the number of times JPG is compressed) and do all the actions at once (or use formats that save lossless images (e.g. PNG).
Most of the options discussed below can be combined with each other, as well as with the familiar -scale PIXELS and -quality QUALITY options.
For example:
magick IMAGE.jpg -scale 200 -paint 1 test.jpg
You can also combine the already considered image conversion with any options. That is, in one command you can modify the image and convert it to another format:
magick IMAGE.jpg -scale 200 -paint 1 test.png
How to extract an area of an image (cropping a picture)
To extract a region of an image use the option -extract WIDTHxHEIGHT+x0+y0
In this line:
- WIDTH – the width of the area to be extracted
- HEIGHT – the height of the area to be extracted
- x0 – x coordinate of the upper left corner of the area to be extracted
- y0 – y coordinate of the upper left corner of the area to be extracted
The -extract option must come before the image from which the region is being extracted!
After using this option (after the name of the file from which the region is extracted), specify the +repage option, which will override this option, otherwise it will be applied to all images processed in this command.
The following command extracts a 500×400 pixel area from the IMAGE.jpg file, which is located at a distance of 300 pixels from the left edge and 150 pixels from the top edge, and saves the resulting new image to the test21.jpg file:
magick -extract 500x400+300+150 IMAGE.jpg +repage test21.jpg
Instead of the -extract WIDTHxHEIGHT+x0+y0 option, you can use the format:
FILE[WIDTHxHEIGHT+x0+y0]
The following command is identical to the previous one:
magick 'IMAGE.jpg[500x400+300+150]' +repage test21.jpg
When processing a large number of photos, to save computer resources (primarily RAM), use Image cropping while reading.
How to apply an effect to an area of an image
By default, the options shown below change the entire image. If you want to change only a certain area of the image, then use the option -region WIDTHxHEIGHT+x0+y0
In this line:
- WIDTH – the width of the area being modified
- HEIGHT – the height of the area being modified
- x0 – x coordinate of the upper left corner of the area being modified
- y0 – y coordinate of the upper left corner of the area being modified
For example, in the following command, the -negate effect (see the description of this option below) will be applied only to the 500×400 pixel area of the IMAGE.jpg image, which is located at a distance of 300 pixels from the left edge and 150 pixels from the top edge, the resulting new image is saved in test21.jpg file:
magick IMAGE.jpg -region 500x400+300+150 -negate test21.jpg

How to imitate an oil painting
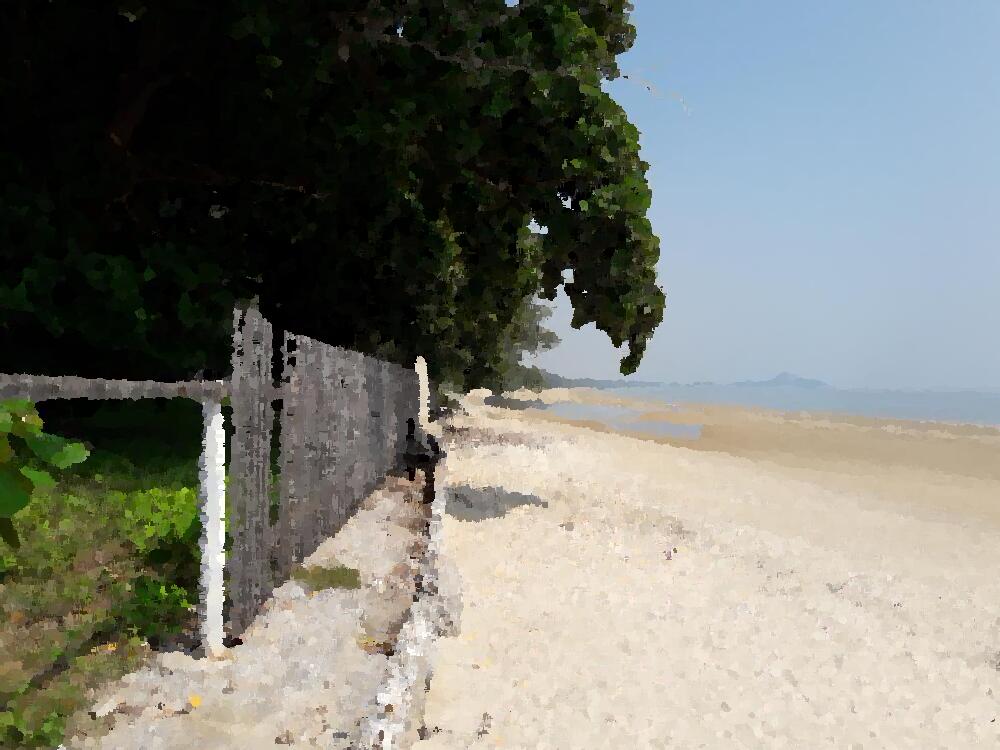
To make the photo look like a painting, use the -paint RADIUS option.
This option creates an imitation of an oil painting.
Each pixel is replaced by the most frequently occurring color in a circular neighborhood whose width is determined by the radius.
Command example:
magick IMAGE.jpg -paint 4 test1.jpg
Result:
How to imitate a charcoal drawing
To make the photo look like it was drawn with charcoal, use the -charcoal RADIUS option.
Command example:
magick IMAGE.jpg -charcoal 5 test2.jpg
Result:
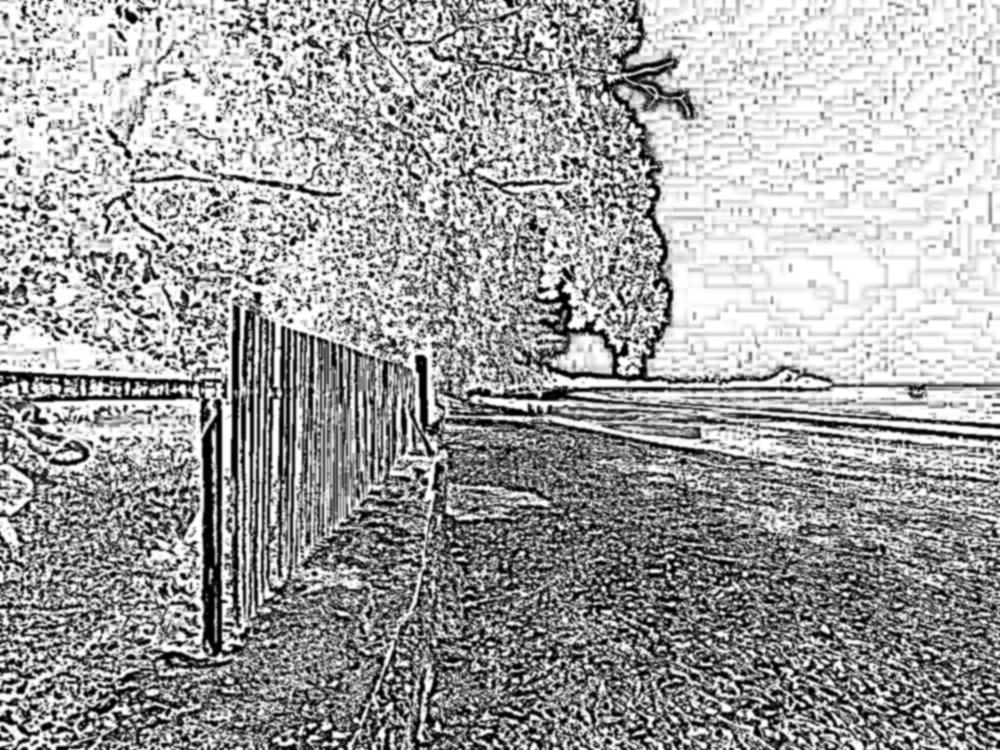
How to mimic a pencil sketch
The -sketch GEOMETRY option creates a simulated pencil sketch.
Command example:
magick IMAGE.jpg -sketch 5 test3.jpg
Result:
This option has the following syntax options:
- -sketch radius
- -sketch radius{xsigma}+angle
The last version of the option creates a sketch with the specified radius, standard deviation (sigma) and angle. The specified angle is the angle at which the image is drawn. This is the direction people think the object is coming from.
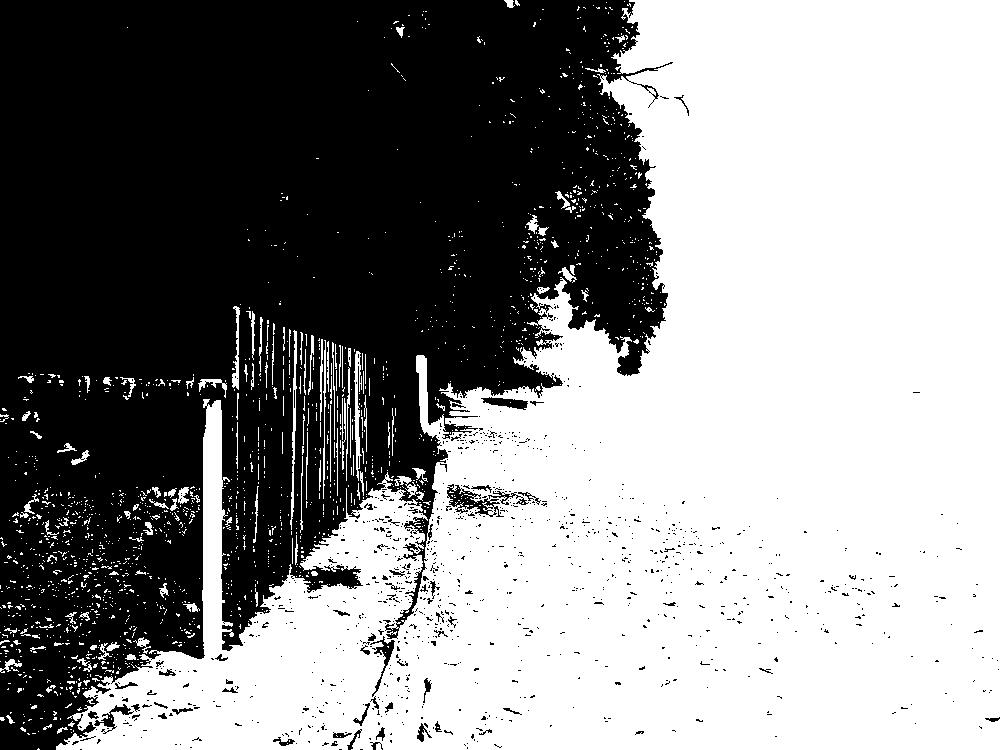
How to make an image black and white
How to convert an image to black and white on the Linux command line? With the -monochrome option, you can convert an image to black and white.
Command example:
magick IMAGE.jpg -monochrome test4.jpg
Result:
How to create an image negative
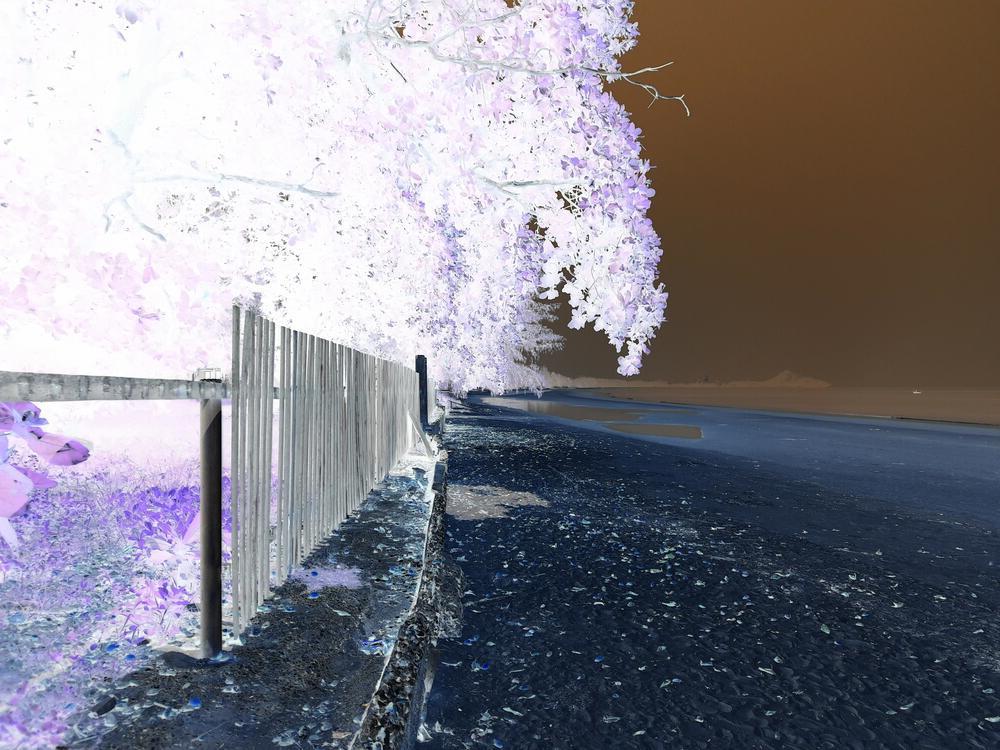
With the -negate option, you can replace each pixel with its complementary color.
The red, green, and blue intensity of the image is inverted. White becomes black, yellow becomes blue, and so on. Use +negate to invert only the pixels in a grayscale image.
Command example:
magick IMAGE.jpg -negate test5.jpg
Result:
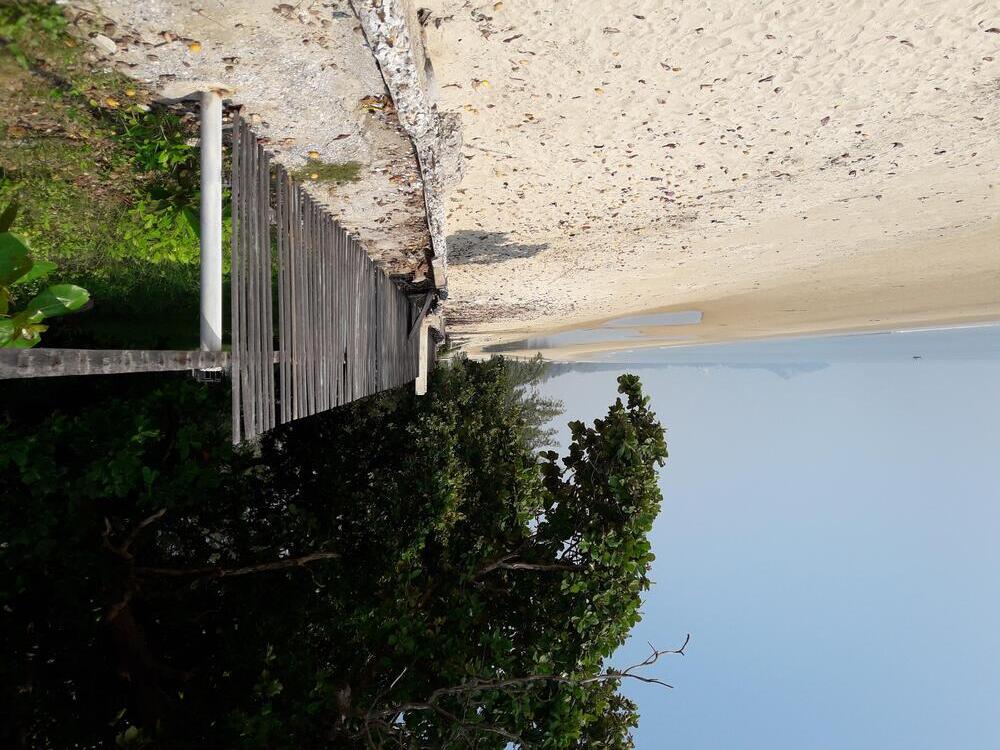
How to flip and flop images (vertical and horizontal image mirroring) on the Linux command line
To flip and flop an image horizontally or vertically, use the options:
- -flip (image will be flipped upside down)
- -flop (the image will be flopped, mirrored from left to right - just like in a mirror)
Command example:
magick IMAGE.jpg -flip test6.jpg
Result:
Command example:
magick IMAGE.jpg -flop test7.jpg
Result:
How to rotate an image on the Linux command line
To rotate an image, use the -rotate DEGREES option. Degrees can be set to either positive (for clockwise rotation) or negative (for counterclockwise rotation) values. For example:
magick IMAGE.jpg -rotate 30 test8.jpg
magick IMAGE.jpg -rotate -30 test8.jpg
By default, the empty corners that appear will be filled with white, if you want to change the color, then use the -background option:
magick IMAGE.jpg -background VioletRed -rotate 30 test8.jpg
You can see the names of all colors with the following command:
magick -list color
See also:
If you want to rotate the image and fill the empty corners with stretched bands of color around the edges of the image, then use the -distort ScaleRotateTranslate ANGLE option, for example:
magick IMAGE.jpg -distort ScaleRotateTranslate 30 test9.jpg

If you want to have the image scaled up to fill the entire space instead of filling empty edges, then use the -distort ScaleRotateTranslate SCALE,ANGLE option, for example:
magick IMAGE.jpg -distort ScaleRotateTranslate 1.5,30 test10.jpg

The -distort ScaleRotateTranslate option can take a different number of arguments, which also change its behavior:
magick IMAGE.jpg -distort ScaleRotateTranslate 500,500,30 test10.jpg
See the -distort option help for details: https://imagemagick.org/script/command-line-options.php#distort
Two more options related to rotating and flipping images:
- -transpose: will flip the image diagonally from top left to bottom right. This option mathematically transposes an array of pixels. It is equivalent to the “-flip -rotate 90” option sequence.
- -transverse: Flips the image diagonally from the bottom left image to the top right. Equivalent to “-flop -rotate 90”.
Examples of using:
magick IMAGE.jpg -transpose test11.jpg
magick IMAGE.jpg -transverse test11.jpg
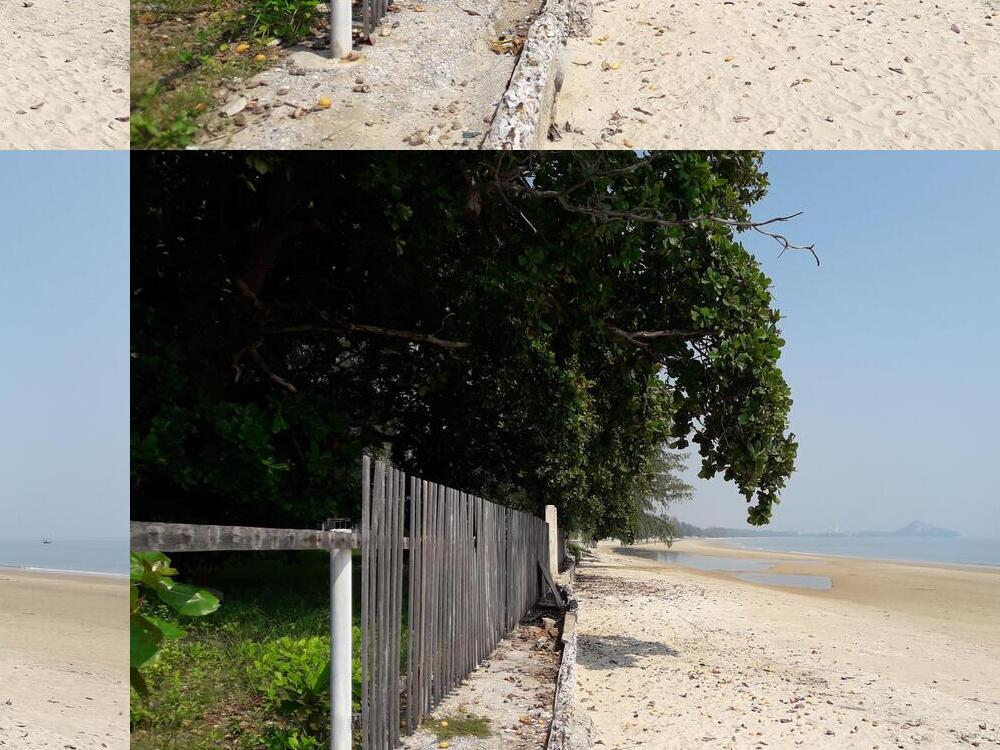
Rolling images. Film effect
The -roll GEOMETRY option rotates the image vertically or horizontally so that its parts are on the opposite side. As an argument to the -roll option, you need to specify two numbers, which can be both positive and negative, which indicate the number of pixels by which you want to rotate the image vertically and horizontally.
Command example:
magick IMAGE.jpg -roll +130+150 test11.jpg
Result:
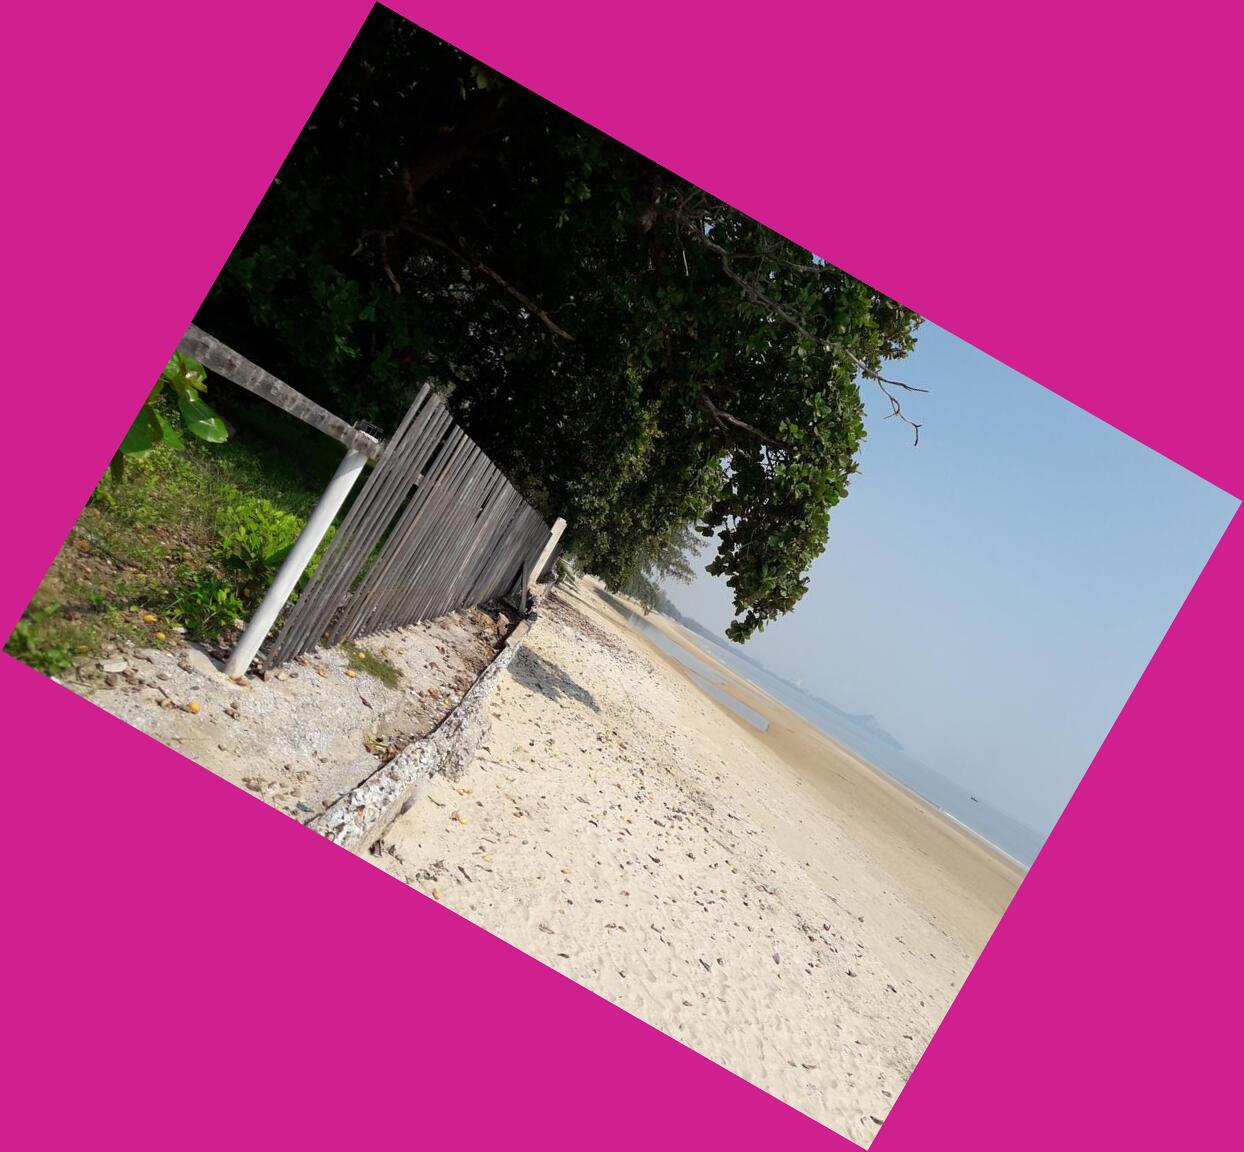
How to simulate a Polaroid photo on the command line
With the -polaroid ANGLE option, you can simulate a Polaroid photo.
Angle indicates how much the image should be rotated.
Command example:
magick IMAGE.jpg -polaroid -10 test12.jpg
Result:
How to reduce image noise on the Linux command line
The -noise GEOMETRY option does not work in recent versions of ImageMagick because it has been deprecated. Use -statistic NonPeak INTENSITY instead.
For example:
magick IMAGE.jpg -statistic NonPeak 3 test13.jpg

Too high INTENSITY values make the image unrealistic.
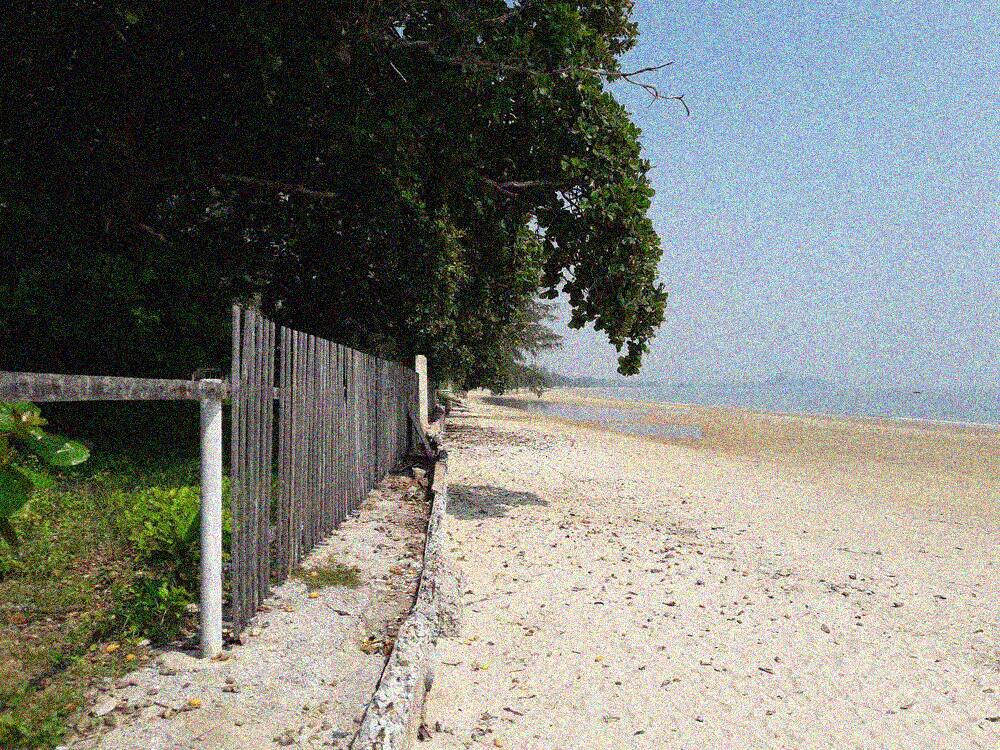
How to increase image noise on the Linux command line
To increase noise, use the following set of options: -attenuate INTENSITY +noise TYPE
For INTENSITY, enter a number (default 1.0). For Noise TYPE, select from the following options:
- Gaussian
- Impulse
- Laplacian
- Multiplicative
- Poisson
- Random
- Uniform
Note that Random will replace the image with noise, not add noise to the image. Use Uniform if you want to add random noise to an image.
Command example:
magick IMAGE.jpg -attenuate 1.5 +noise Gaussian test14.jpg
Result:
You can achieve the same result with the -evaluate option, for example:
magick IMAGE.jpg -evaluate Gaussian-noise 1.5 test14.jpg
Detailed description of the -evaluate option and its possible arguments: https://imagemagick.org/script/command-line-options.php#evaluate
How to lighten or darken the edges of an image
The -raise VALUE option will lighten or darken the edges of the image to create a 3D effect.
This will create a 3D effect. Use -raise to create a raised effect, otherwise use +raise.
magick IMAGE.jpg -raise 50 test22.jpg
magick IMAGE.jpg +raise 50 test22.jpg

Unlike the similar -frame option (discussed below), -raise does not resize the image.
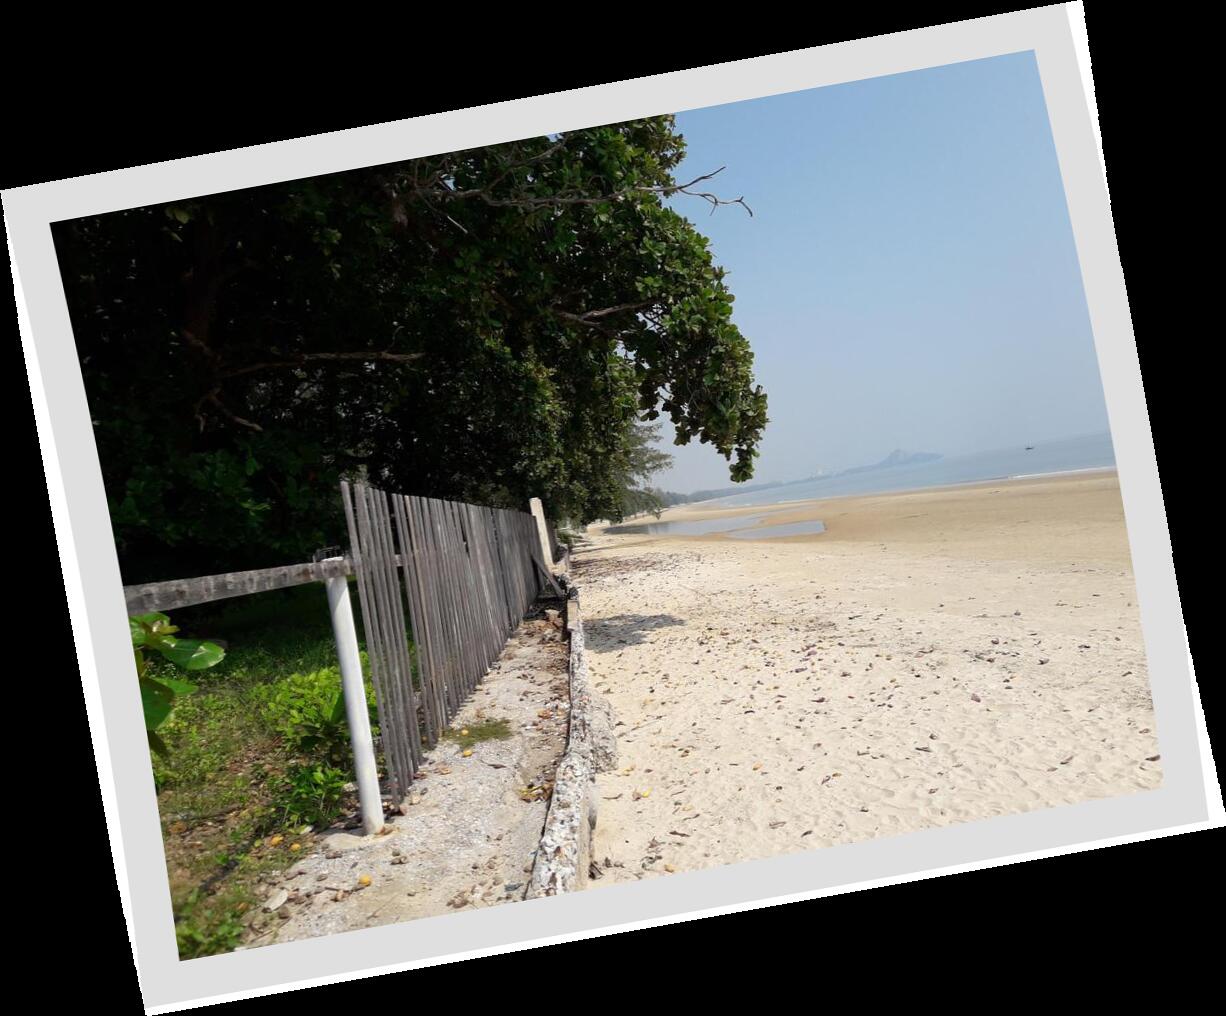
How to create a border around an image
To frame an image, use the -frame option.
If you want a single-color frame without effects, then specify a single number after -frame:
magick IMAGE.jpg -mattecolor peru -frame 19 test23.jpg
If you want a frame with a 3D effect, then specify four numbers: -frame AxA+B+C:
magick IMAGE.jpg -mattecolor peru -frame 19x19+3+6 test23.jpg

The first two numbers (A) determine the thickness of the frame, the second number (B) determines the thickness of the outer edge, the last number (C) determines the thickness of the inner edge.
The -mattecolor option sets the border color.
You can see the names of all colors with the following command:
magick -list color
See also:
How to create a vignette
The -vignette option softens the edges of the image in a vignette style.
Format: -vignette RADIUS{xSIGMA}{+-}x{+-}y{%}
The falloff of the vignette effect is controlled by RADIUSxSIGMA (there are two variables, radius and sigma, and the multiplication sign, i.e. radius x sigma). For nominal rolloff, this would be set to 0xsigma. A value of 0x0 will produce a circle/ellipse with no rolloff. The arguments x and y control the size of the circle. Larger values decrease the radii and smaller values increase the radii. Values of +0+0 will generate a circle/ellipse the same size as the image. The default values for x and y are 10% of the corresponding image dimension. Thus, the radii will be decreased by 10%, i.e., the diameters of the circle/ellipse will be 80% of the corresponding image dimension. Note, the percent symbol in a geometry affects x and y, whereas radius and sigma are absolute (e.g., -vignette "0x2+10%+10%").
Command examples:
magick IMAGE.jpg -vignette 20x100 test24.jpg
magick IMAGE.jpg -vignette 0x100 test24.jpg
Result of the last command:
Many examples of how to make various frames and frames for images can be found at the link: https://imagemagick.org/Usage/thumbnails/
How to lighten an image. How to increase exposure
To increase the amount of white, use the -sigmoidal-contrast NUMBER,0% option. The larger the NUMBER, the stronger the change will be, for example:
magick IMAGE.jpg -sigmoidal-contrast 4,0% test25.jpg
To reduce the amount of black, use the +sigmoidal-contrast NUMBER,100% option. The larger the NUMBER, the stronger the change will be, for example:
magick IMAGE.jpg +sigmoidal-contrast 4,100% test25.jpg
How to make an image darker. How to reduce exposure
To reduce the amount of white, use the +sigmoidal-contrast NUMBER,0% option. The larger the NUMBER, the stronger the change will be, for example:
magick IMAGE.jpg +sigmoidal-contrast 4,0% test26.jpg
To increase the amount of black, use the -sigmoidal-contrast NUMBER,100% option. The larger the NUMBER, the stronger the change will be, for example:
magick IMAGE.jpg -sigmoidal-contrast 4,100% test26.jpg

Related articles:
- How to add text to images in ImageMagick (100%)
- How to composite and append images on the Linux command line (overlay and merge images) (100%)
- How to add a caption to a large number of images (100%)
- ImageMagick guide: installing, using, and troubleshooting (94.3%)
- How to convert images to any formats in Linux (SOLVED) (94.3%)
- How to update the GRUB bootloader in Arch Linux and derivatives (Manjaro, BlackArch) (RANDOM - 50%)