How to install Apache web server with PHP, MySQL and phpMyAdmin on Windows
February 22, 2021
Table of contents
2. How to install Apache on Windows
3. How to install PHP on Windows
5. How to install MySQL on Windows
6. How to install phpMyAdmin on Windows
Windows web server
A web server is a program that is designed to process requests for websites and send website pages to users. The most popular example of a web server is Apache.
PHP is a programming language. Also, it called an environment for executing scripts written in PHP. In operating systems, including Windows, PHP can be installed independently, without a web server. In this case, programs (scripts) in PHP can be run from the command line. But web applications use PHP very often, this interpreter has become, in fact, the standard for web servers and therefore they are almost always installed together.
MySQL is a database management system (DBMS). It is also a standalone program, it is used to store data, search databases, modify and delete data. Web applications need persistent storage, so a DBMS is additionally installed for the web server. By the way, it is quite possible that you have heard about MariaDB - this is also a DBMS. MySQL came first, and then MariaDB forked from it. For web applications, both of these DBMS are interchangeable, that is, there is no difference. In this tutorial I will show the installation using MySQL as an example.
As for phpMyAdmin, this is just a PHP script that is designed to work with databases - it visually displays their contents, allows you to perform tasks in the graphical interface such as creating databases, creating tables, adding, changing and deleting information, etc. For this reason phpMyAdmin is quite popular, although it is not a required part of the web server.
The peculiarity of Apache and other web server components is that they have their roots in Linux. And these programs apply the basic concepts of this operating system in their work. For example, programs are very flexible in customization - you can install in any folder, sites can also be placed in any folder, including on another drive, not on the one where the web server itself is installed. Even the log files can be moved to the third disk and so on. The web server has many built-in modules - you can enable or disable them in any combination, you can add external modules. You can create many sites on the same web server and customize each site. But this flexible setting is done through text files - this is the approach (without a graphical interface) that allows you to describe any configuration
Do not be afraid of this - I will tell you what files need to be edited and what exactly to write in them.
We will not do any complex settings - our goal is just to install the web server on Windows. However, it would be strange not to use that kind of power in tuning at all. We will split the server into two directories: the first will contain executable files, and the second will contain data (website and database files). In the future, when the need arises to make backups of information or update the web server, you will understand how convenient this approach is!
We will install the server in a separate directory. To do this, create the “Server” directory in the root of the C:\ drive. Create 2 subdirectories in this directory: “bin” (for executable files) and “data” (for sites and databases).
Go to the “data” directory and create subfolders “DB” (for databases) and “htdocs” (for web sites) there.
Go to the “C:\Server\data\DB\” directory and create an empty “data” folder there.
For the operation of all components of the web server, the file “Visual C++ Redistributable for Visual Studio 2015-2019" is required - this is the official file from Microsoft. To download it follow the link. After downloading, run this file and complete the installation.
The preparatory steps are completed, we proceed to the installation of the web server components.
How to install Apache on Windows
Go to apachelounge.com/download and download the .zip archive with the web server:
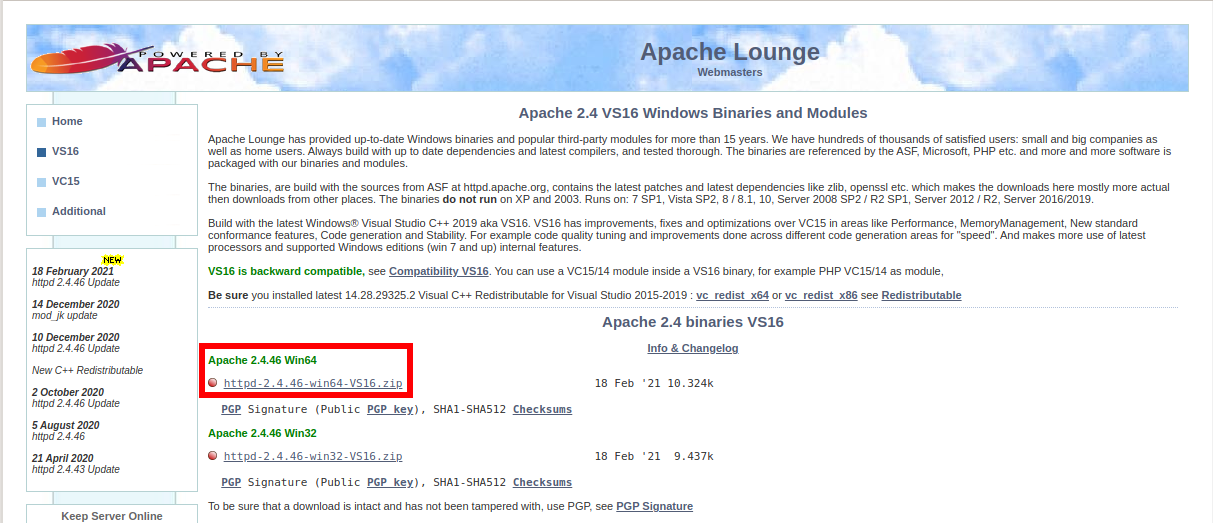
Unpack the “Apache24” folder from this archive to “C:\Server\bin\”.
Go to the “C:\Server\bin\Apache24\conf\” directory and open the httpd.conf file with any text editor.
In it, we need to replace a number of lines.
Change
Define SRVROOT "c:/Apache24"
on
Define SRVROOT "c:/Server/bin/Apache24"
change
#ServerName www.example.com:80
on
ServerName localhost
change
DocumentRoot "${SRVROOT}/htdocs"
<Directory "${SRVROOT}/htdocs">
on
DocumentRoot "c:/Server/data/htdocs"
<Directory "c:/Server/data/htdocs">
change
DirectoryIndex index.html
on
DirectoryIndex index.php index.html index.htm
change
# AllowOverride controls what directives may be placed in .htaccess files.
# It can be "All", "None", or any combination of the keywords:
#   AllowOverride FileInfo AuthConfig Limit
#
AllowOverride None
on
# AllowOverride controls what directives may be placed in .htaccess files.
# It can be "All", "None", or any combination of the keywords:
#   AllowOverride FileInfo AuthConfig Limit
#
AllowOverride All
and change
#LoadModule rewrite_module modules/mod_rewrite.so
on
LoadModule rewrite_module modules/mod_rewrite.so
We save and close the file. That's it, Apache configuration is complete!
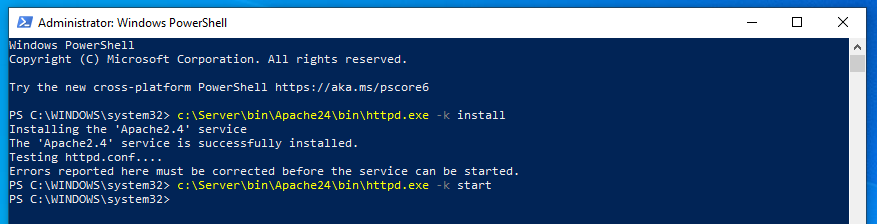
Open a command prompt (you can do this by pressing the Win+x keys at the same time).
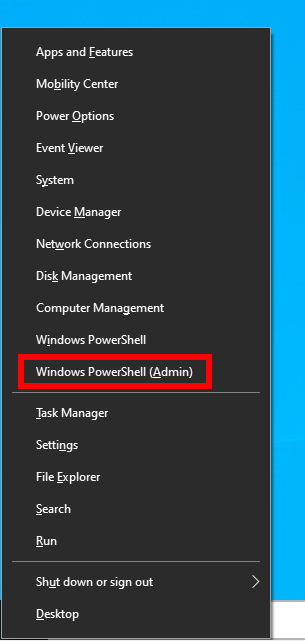
Select Windows PowerShell (Admin) there and copy there:
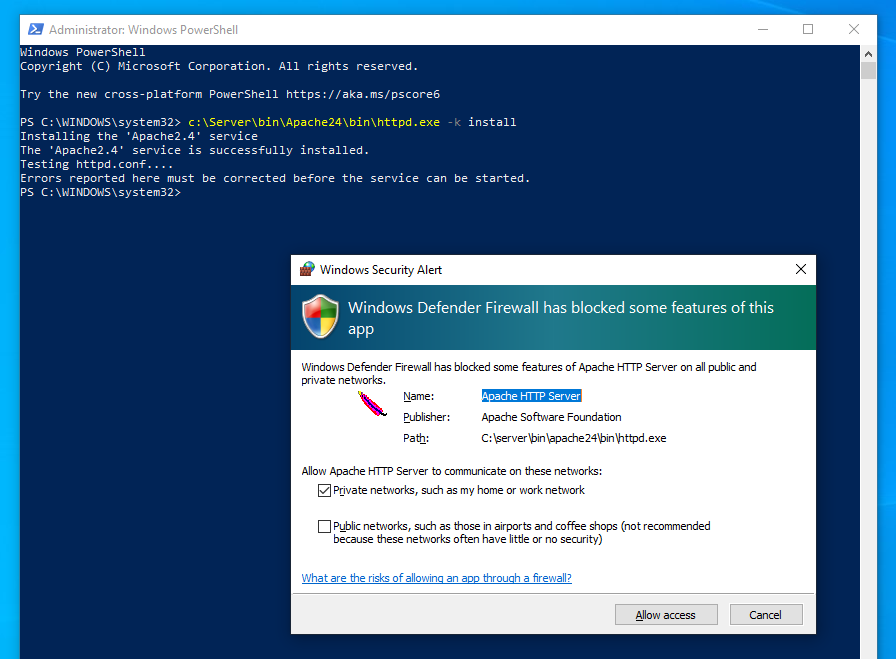
c:\Server\bin\Apache24\bin\httpd.exe -k install
Press Enter.
If you get a request from the firewall regarding Apache, then click Allow access.
Now we enter into the command line:
c:\Server\bin\Apache24\bin\httpd.exe -k start
And press Enter.
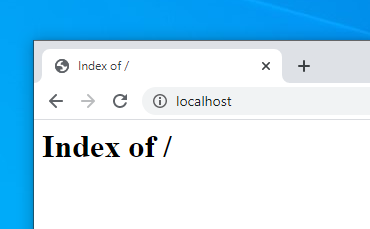
Now in the browser, type http://localhost/ and see the following:
This means the web server is running. To see the files there, add them to the c:\Server\data\htdocs\ directory - this is the main folder for the server data, where all sites will be located.
How to install PHP on Windows
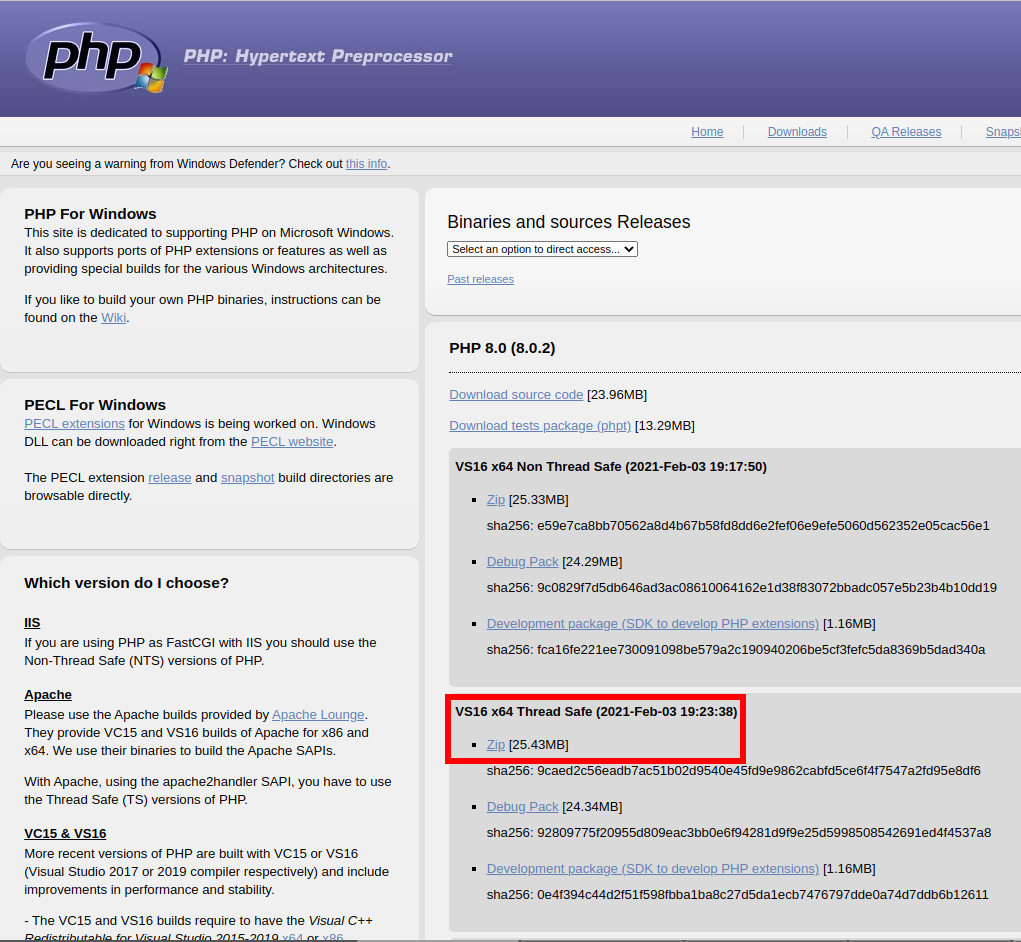
Download PHP 8 from windows.php.net/download. Choose Thread Safe version, pay attention to select 64-bit computer architecture.
In the c:\Server\bin\ folder, create a “PHP” directory and copy the contents of the just downloaded archive into it.
In the file c:\Server\bin\Apache24\conf\httpd.conf at the very end we add the lines:
PHPIniDir "C:/Server/bin/PHP"
AddHandler application/x-httpd-php .php
LoadModule php_module "C:/Server/bin/php/php8apache2_4.dll"
And restart Apache:
c:\Server\bin\Apache24\bin\httpd.exe -k restart
In the c:\Server\data\htdocs\ directory, create a file called i.php, copy it to this file:
<?php
phpinfo ();
In your browser, open the link http://localhost/i.php. If you see something similar, then PHP is working:

PHP 8 setup
PHP is configured in the php.ini file. There is no php.ini in the zip archives intended for manual installation and for updates (this is done on purpose so that you do not accidentally delete your settings file during the update). But there are two others called php.ini-development and php.ini-production. Any of them, during manual installation, can be renamed to php.ini and further configured. On the localhost we will use php.ini-development.
Open the php.ini file with any text editor, looking for the line
;extension_dir = "ext"
and replace it with
extension_dir = "C:\Server\bin\PHP\ext\"
Now find the line group:
;extension=bz2
;extension=curl
;extension=ffi
;extension=ftp
;extension=fileinfo
;extension=gd
;extension=gettext
;extension=gmp
;extension=intl
;extension=imap
;extension=ldap
;extension=mbstring
;extension=exif      ; Must be after mbstring as it depends on it
;extension=mysqli
;extension=oci8_12c  ; Use with Oracle Database 12c Instant Client
;extension=oci8_19  ; Use with Oracle Database 19 Instant Client
;extension=odbc
;extension=openssl
;extension=pdo_firebird
;extension=pdo_mysql
;extension=pdo_oci
;extension=pdo_odbc
;extension=pdo_pgsql
;extension=pdo_sqlite
;extension=pgsql
;extension=shmop
and replace it with:
extension=bz2
extension=curl
extension=ffi
extension=ftp
extension=fileinfo
extension=gd
extension=gettext
extension=gmp
extension=intl
extension=imap
extension=ldap
extension=mbstring
extension=exif      ; Must be after mbstring as it depends on it
extension=mysqli
;extension=oci8_12c  ; Use with Oracle Database 12c Instant Client
extension=odbc
extension=openssl
;extension=pdo_firebird
extension=pdo_mysql
;extension=pdo_oci
extension=pdo_odbc
extension=pdo_pgsql
extension=pdo_sqlite
extension=pgsql
extension=shmop
now uncomment this line group:
;extension=soap
;extension=sockets
;extension=sodium
;extension=sqlite3
;extension=tidy
;extension=xsl
it should look like this:
extension=soap
extension=sockets
extension=sodium
extension=sqlite3
extension=tidy
extension=xsl
With these actions, we enabled the extensions. They may be needed in different situations for different scripts. Save the file and restart Apache.
c:\Server\bin\Apache24\bin\httpd.exe -k restart
It is highly recommended to add the path to PHP to your “PATH” environment variable on Windows.
Related: How to add PHP path to %PATH% environment variable on Windows
How to install MySQL on Windows
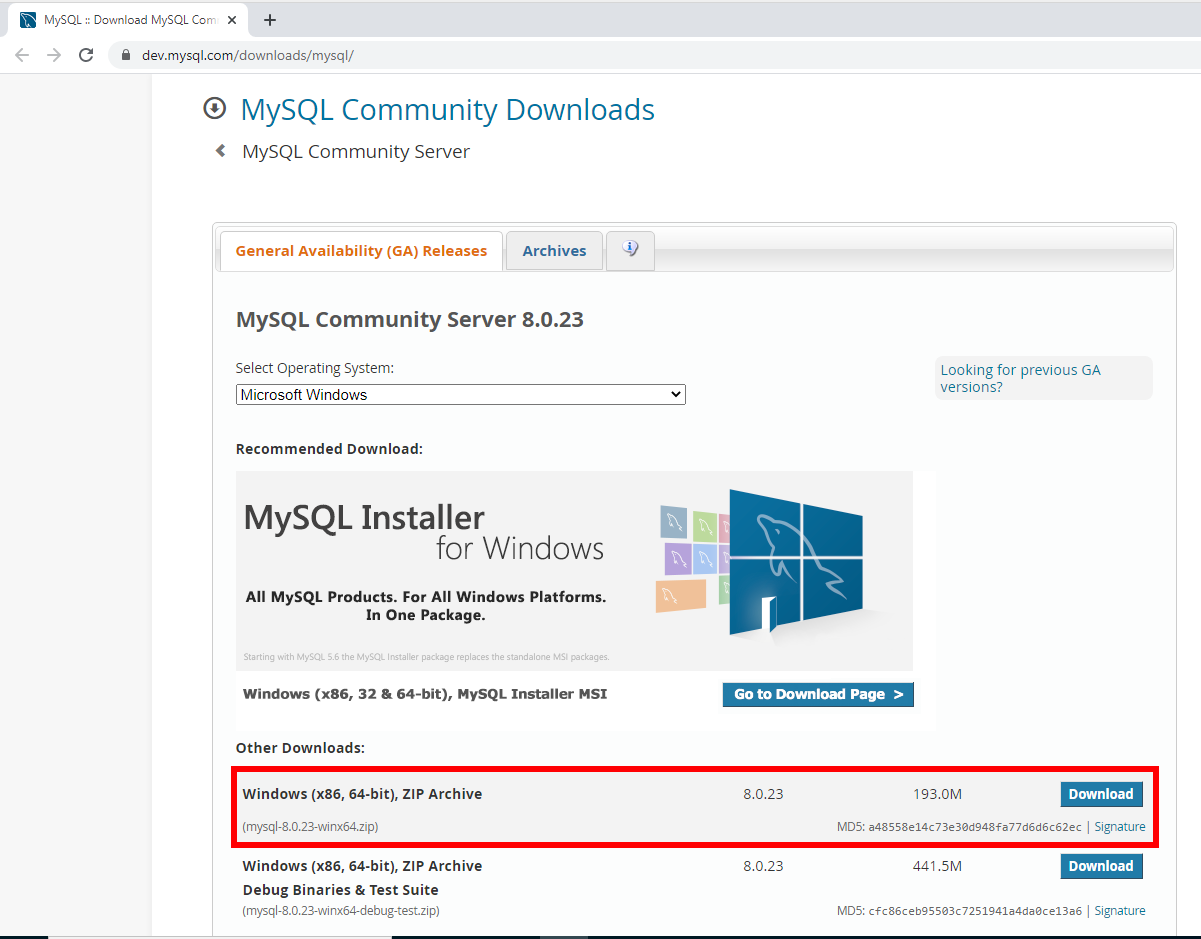
The free version of MySQL is called MySQL Community Server. It can be downloaded from https://dev.mysql.com/downloads/mysql/. There is an executable installer on the same page, but I recommend downloading the ZIP archive.
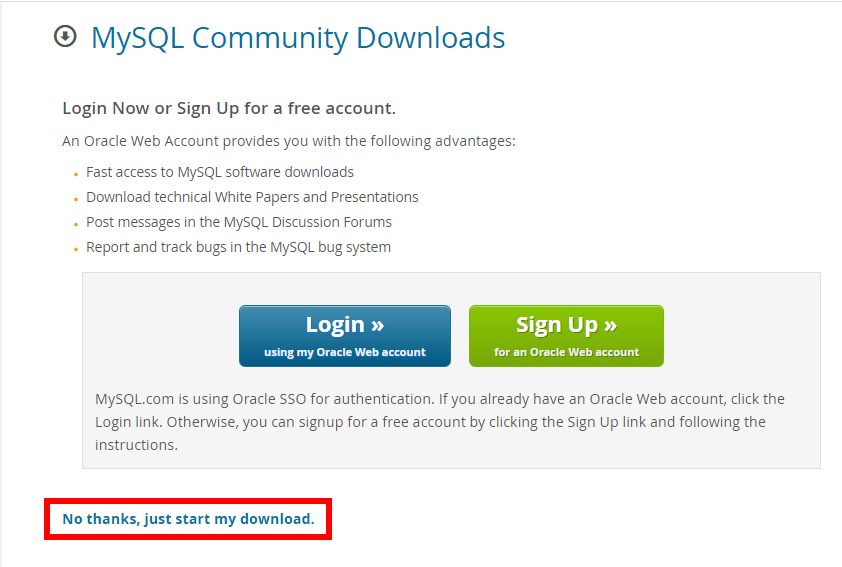
On the download page, we are offered to register or log into an existing account - but this is optional. Just click on the link “No thanks, just start my download”.
Unpack the files from the just downloaded archive into the c:\Server\bin\ directory. The unpacked folder will be named approximately mysql-8.0.23-winx64 (depending on the version), rename it to mysql-8.0.
We go into this folder and create the my.ini file there. Now open this file with any text editor and add the following lines there:
[mysqld]
sql_mode=NO_ENGINE_SUBSTITUTION,STRICT_TRANS_TABLES
datadir="c:/Server/data/DB/data/"
default_authentication_plugin=mysql_native_password
Save and close it.
The configuration is complete, but you still need to perform the initialization and installation, for this we open the command line as administrator and sequentially enter there:
C:\Server\bin\mysql-8.0\bin\mysqld --initialize-insecure --user=root
C:\Server\bin\mysql-8.0\bin\mysqld --install
net start mysql
At the end of this process, the automatically generated files should appear in the C:\Server\data\DB\data\ directory.
The MySQL service will now start every time Windows starts.
How to install phpMyAdmin on Windows
The phpMyAdmin download site is phpmyadmin.net.
Direct link to the most recent version: phpMyAdmin-latest-all-languages.zip.
Copy the contents of the just downloaded archive to the c:\Server\data\htdocs\ directory. Rename this folder to “phpmyadmin”.
In the c:\Server\data\htdocs\phpmyadmin\ directory, create a config.inc.php file and copy there:
<?php

/* Servers configuration */
$i = 0;

/* Server: localhost [1] */
$i++;
$cfg['Servers'][$i]['verbose'] = '';
$cfg['Servers'][$i]['host'] = 'localhost';
$cfg['Servers'][$i]['port'] = '';
$cfg['Servers'][$i]['socket'] = '';
$cfg['Servers'][$i]['connect_type'] = 'tcp';
$cfg['Servers'][$i]['auth_type'] = 'cookie';
$cfg['Servers'][$i]['user'] = 'root';
$cfg['Servers'][$i]['password'] = '';
$cfg['Servers'][$i]['nopassword'] = true;
$cfg['Servers'][$i]['AllowNoPassword'] = true;

/* End of servers configuration */

$cfg['blowfish_secret'] = 'kjLGJ8g;Hj3mlHy+Gd~FE3mN{gIATs^1lX+T=KVYv{ubK*U0V';
$cfg['DefaultLang'] = 'en';
$cfg['ServerDefault'] = 1;
$cfg['UploadDir'] = '';
$cfg['SaveDir'] = '';

?>
In the browser, type http://localhost/phpmyadmin/
Enter root as the username. Leave the password field blank.
Conclusion
That's it - you now have your own personal local web server on your home computer.
If suddenly something didn't work out for you, then most likely you missed a step or did it incorrectly - try to do everything exactly according to the instructions. If the problem persists, then write about your error in the comments.
Related articles:
- What is open_basedir for and how to use open_basedir (81.6%)
- Configuring Apache Web Server to Run Perl Programs on Windows (78.5%)
- Error “Composer detected issues in your platform: Your Composer dependencies require the following PHP extensions to be installed: mysqli, openssl” (SOLVED) (75.9%)
- How to fix “Configuration File (php.ini) Path” no value (SOLVED) (70.1%)
- How to show all errors in PHP 8 (70.1%)
- PHP Warning: PHP Startup: imap: Unable to initialize module (SOLVED). How to install the imap module for PHP on Arch Linux (RANDOM - 11.5%)