
Free plugin to add ads in WordPress
March 28, 2019
How to work with Quick Adsense plugin to insert ads in WordPress
You can insert ads on the site in different ways. For example, you can edit the HTML code. I want to talk about a much simpler version, while very flexible.
There are many plugins to insert ads in WordPress. Including, there are various paid. I use a free plugin that can do everything that most webmasters need. I have been working with this plugin since 2014, i.e. at the time of writing, this is already the fifth year. During this time, the plugin has shown its reliability.
This plugin is called Quick Adsense. Do not be confused by the word AdSense in the title – you can advertise any networks. For example, besides AdSense, I use the same plugin for CPA. Previously, I used it to insert my own ads, banners from other partner networks, just alerts for users.
Install Quick Adsense
Quick Adsense is present in the official WordPress plugin repository, so it installs directly from the WordPress control panel.
During the installation of the plugin, do not confuse it with similar ones. Especially with Quick Adsense Mobile – this plugin mimics under Quick Adsense, including repeating its design. Be careful – Quick Adsense Mobile appeared relatively recently, and apart from the fact that it tries to be ‘the second Quick Adsense’ and has not been updated for a long time, there is nothing special to say about it.
How does Quick Adsense work?
This plugin has 20 slots: 10 slots for inserting ads into text (Ads on Post Body), as well as 10 slots for inserting ads into widgets (Sidebar Widget).
The slots look like windows for entering the ad network code:
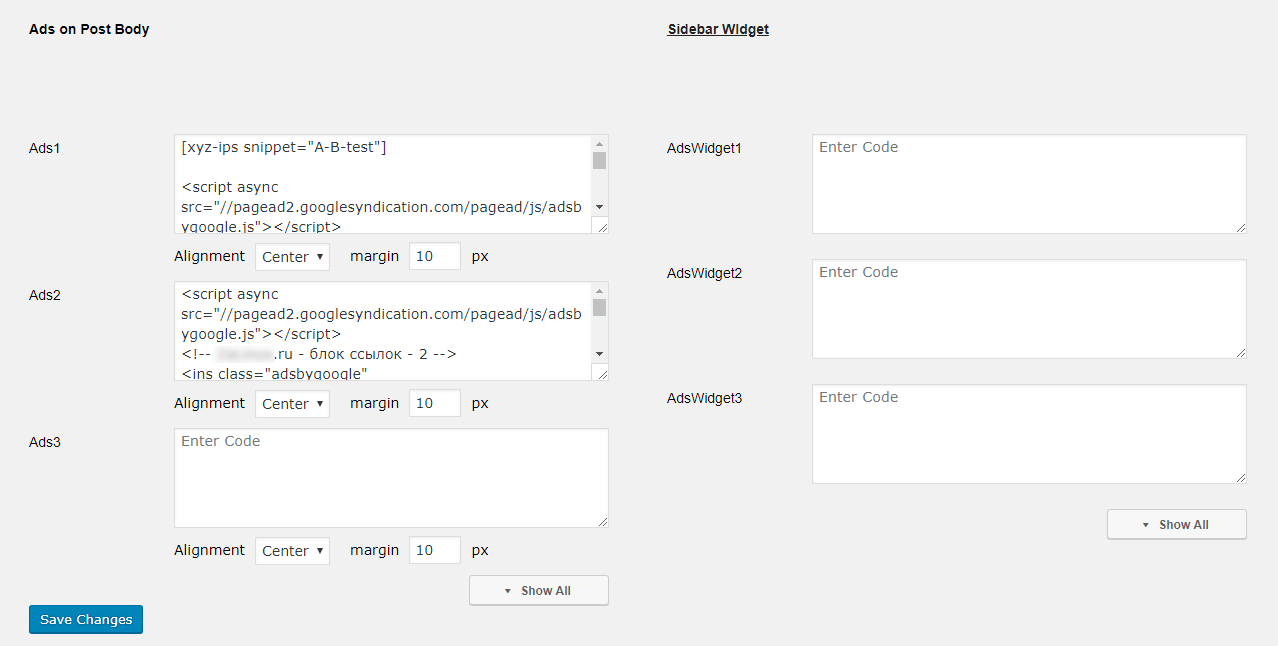
If you click on the Show All button, you can see them all:

In these slots, insert the code of ad units that you want to show on your site. Do not forget to click the Save Changes button to save the changes made.
Although AdSense allows you to use the same ad code multiple times on the same page (show the same ad unit multiple times), this plugin requires each ad to be unique: ads with duplicate code can cause problems in the display of advertisements; the same ad is never shown on the page more than once.
At the top of the Quick Adsense settings page are the controls – this is where you specify where the ad units will be placed on the page:

The inscription Reset to Default Settings means reset to the initial settings – be careful with this! ![]()
Next comes Place up to NUMBER Ads on a page. This means the number of ads that can be used. This setting refers to the time when you could use no more than three ad units per page (I mean AdSense). Just set the maximum number (10) no matter how many blocks you will use: 1, 2, 5 or all 10.
Automatic display of ads in certain places of the site
Moving on to the most interesting – Assign position – assigning position to ad units.
Beginning of Post - means the beginning of the article, i.e. after the title, but before the text. If you want to use this location, then tick. By default, a random slot will be used (Random Ads) to change this, select a specific ad that should be inserted at the beginning of the article, for example, Ads1 - this means that the ad code from the first slot will be inserted at the beginning of the article.
Middle of Post – the middle of the article. If you want to use, check the box and select the ad that should appear in the middle. The middle is considered according to the number of paragraphs, i.e. the total number of paragraphs is taken and divided in half.
End of Post – the end of the article. Please note that the end of the article is considered the last paragraph. Different plugins can display social buttons, related articles, and so on - most likely, the ad unit will be in front of them.
right after the <!--more--> tag – immediately after the <!--more--> tag. The <!--more--> tag separates in the article the beginning of the text, which is shown, for example, on the main page as the first words of the article, to continue which you need to click the Read More button. In my opinion, this block is too close to the block at the beginning of the article and it does not suit me. If you, for example, do not use the block at the beginning of the article, then this option may be suitable for you.
right before the last Paragraph – just before the last paragraph. This block is obtained very close to the block at the end of the article. In my opinion, it is better to use only one of these blocks – either before the last paragraph, or at the end of the article.
Next come three identical points:
after Paragraph NUMBERS repeat CHECKBOX to End of Post if fewer paragraphs are found – means insert ad after the set paragraph number. Or the article is shorter and a checkbox is ticked, the ad will be inserted at the end of the article.
As you can see in my screenshot, I actively use the insertion of ad units into an article. It all depends on the specific site and conditions, but I try to make it so that between the advertising was 10-20 paragraphs of text.
Selecting WordPress pages where to show or not show ads
Next comes the Appearance block:

Here you specify which pages to display ads:
Tick on those types of pages where you want to display ads:
- Posts
- Pages
- Homepage
- Categories
- Archives
- Tagss
- Place all possible Ads on these pages
- Disable AdsWidget on Homepage
- Hide Ads when user is logged in to WordPress – That is, do not show ads to registered users.
Be careful with the Main page – usually there are Ads in the feed, or a special arrangement of ad units is configured, because the appearance of this page is different from the pages of Articles, and the page itself is the “face” of the site.
Do not show ads to registered users is also quite a reasonable solution, i.e. regular visitors stop noticing advertising banners. If the same user regularly clicks on advertising on the same site, then these clicks will most likely will not be taken into account.
Quicktags
If you set up automatic placement of ad units (at the beginning of the article, after the tenth paragraph, at the end of the article, etc.), then you do not need to manually write the tags where you want to add advertising.
However, this can be useful for setting up advertisements on pages where automatic ad blocks output does not work well enough. For example, you can completely disable ads for a specific page; or you can turn off automatically displayed advertisements and indicate your places by showing ad units.
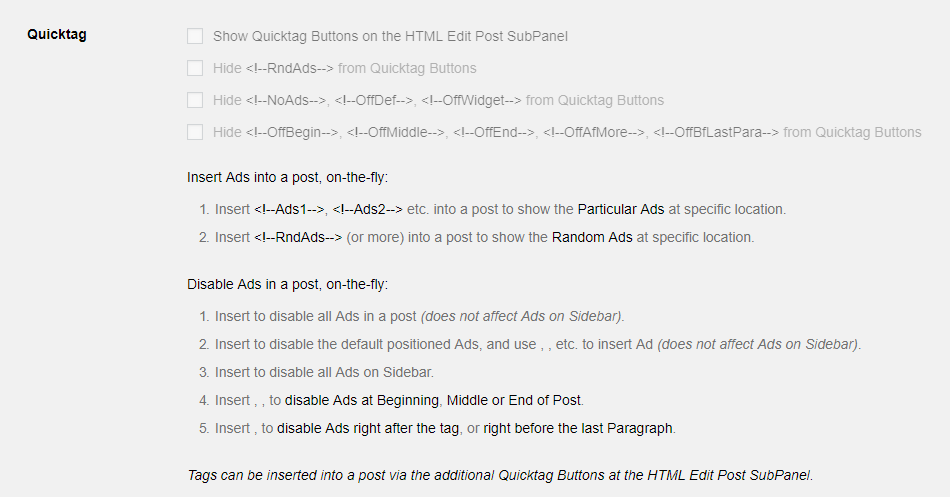
You can display ad insertion buttons next to the editor, for this you have the following options:
Show Quicktag Buttons on the HTML Edit Post SubPanel
Hide <!--RndAds--> from Quicktag Buttons
Hide <!--NoAds-->, <!--OffDef-->, <!--OffWidget--> from Quicktag Buttons
Hide <!--OffBegin-->, <!--OffMiddle-->, <!--OffEnd-->, <!--OffAfMore-->, <!--OffBfLastPara--> from Quicktag Buttons
The item Insert Ads into a post, on-the-fly contains information about tag names, which you can use to insert ad units into an arbitrary place while editing HTML code:
- Paste <!--Ads1-->, <!--Ads2-->, etc into the article for displaying a particular ad in the specified location.
- Paste <<!--RndAds--> (one or more times) into the article to display a random ad in the specified location.
Section Disable Ads in a post, on-the-fly is useful if you do not want to display ads on some page automatically – for example, because the article is too small, or it is sponsorship material, or this is important information and advertising should not distract from content. Examples of tags for managing ads:
- Insert <!--NoAds--> to disable all ads on the page (does not affect ads on the sidebar).
- Insert <!--OffDef--> to disable automatic inserted ads, use <!--Ads1-->, <!--Ads2--> to insert ads (no effect on the sidebar).
- Insert <!--OffWidget--> to disable all ads in the sitebar.
- Insert <!--OffBegin-->, <!--OffMiddle-->, <!--OffEnd--> to disable ads at the beginning, middle or end of the post.
- Insert <!--OffAfMore-->, <!--OffBfLastPara--> to disable ads immediately after the <!--more--> tag or before the last paragraph.
Tags can be inserted through additional Quicktag buttons when editing HTML. If you use an alternative text editor, switch to HTML code and insert these tags manually.
Insert ads in the sidebar
Quick Adsense, as we remember, has 10 slots for inserting ads into the sidebar.
If you saved the ad code in these slots, the corresponding widget appears:

Insert code in the header, footer
Quick Adsense allows you to insert the code in the header (header) and footer (footer) of the site. To do this, go to the Header / Footer Codes tab:
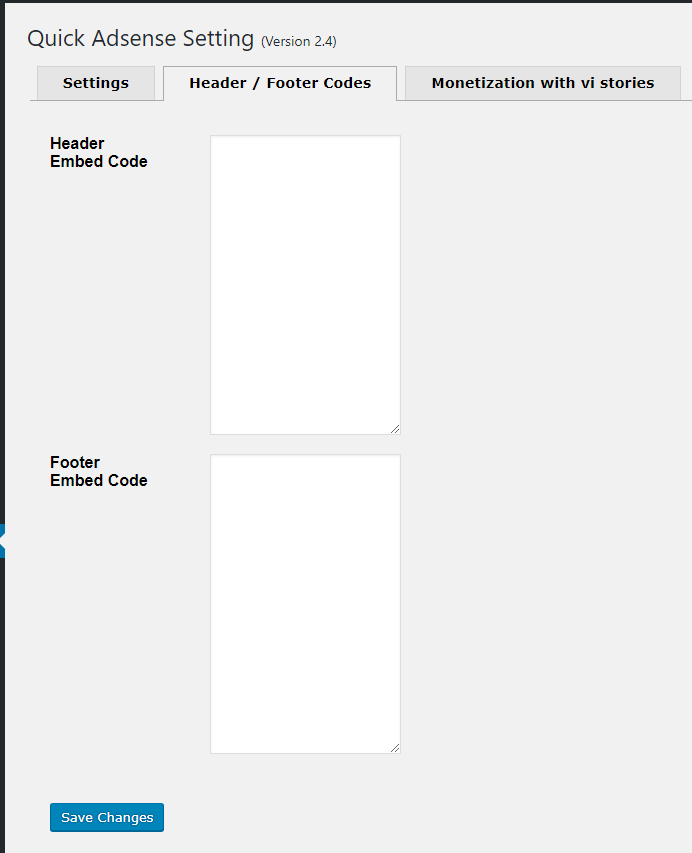
To embed the code in the header, copy it into the Header Embed Code field. An example of code for placing in the header can be the code of Automated AdSense ads.
To paste the code into the footer, copy it into the Footer Embed Code field. For example, I sometimes place counter codes in the footer — here, like in any Quick Adsense slot, the placed code does not have to be the ad code.
Conclusion
Quick Adsense is a free WordPress plugin that allows you to perform almost all the basic advertising manipulations that most webmasters need.
As the pasted code, you can use not only the ad code, but any HTML and JavaScript code, as well as WordPress and plug-ins short-codes.
Related articles:
- Are sticky (floating) AdSense blocks allowed (77.9%)
- Search engine ad: why nothing was found and why it doesn't show ads (77.9%)
- What does “Programmable Search Engine revenue sharing changes start April 30th, 2021” mean? (77.9%)
- Bank accounts in Thailand: how to open, costs, features (50%)
- Western Union Error “There is a technical problem. Please try again later. ” (50%)
- How to block by Referer, User Agent, URL, query string, IP and their combinations in mod_rewrite (RANDOM - 4.1%)