Tag: Windows

How to get data from a web page using GET and POST methods in a Python script on Windows
Posted by Alex On May 21, 2023

ImageMagick error on Windows: “magick: unable to open image ”test’: No such file or directory @ error/blob.c/OpenBlob/3565. magick: no decode delegate for this image format `’ @ error/constitute.c/ReadImage/741.” (SOLVED)
Posted by Alex On November 3, 2022
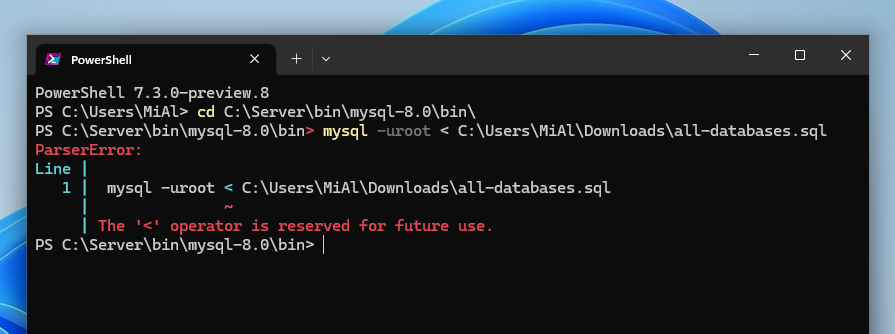
Error “The ‘<‘ operator is reserved for future use.” (SOLVED)
Posted by Alex On October 25, 2022

mysqldump in PowerShell corrupts non-Latin characters when exporting database (SOLVED)
Posted by Alex On October 23, 2022

Output encoding issues in PowerShell and third-party utilities running in PowerShell (SOLVED)
Posted by Alex On October 23, 2022

Apache window appears and immediately disappears (SOLVED)
Posted by Alex On July 3, 2022

How to connect a TV to a computer in Windows 11
Posted by Alex On June 30, 2022

Internet via Bluetooth in Linux: how to set up and why the speed is slow
Posted by Alex On February 22, 2022

How to connect a computer to the Internet via Bluetooth in Windows
Posted by Alex On February 22, 2022

How to use an Android phone to access the Internet on a computer without Wi-Fi
Posted by Alex On February 20, 2022