
How to repair an LVM disk using fsck
November 1, 2021
How to repair an LVM disk
If, due to errors on the disk, the system cannot boot, then usually in the emergency mode console you need to check the disk partitions, approximately as follows (you need to specify your disk name and partition number):
umount /dev/sda2
fsck -y /dev/sda2
But if we are talking about LVM, or LVM with encryption, then the situation becomes more complicated.
See also:
- Error “Cannot open access to console, the root account is locked” (SOLVED)
- How to determine why Linux boots into Emergency mode
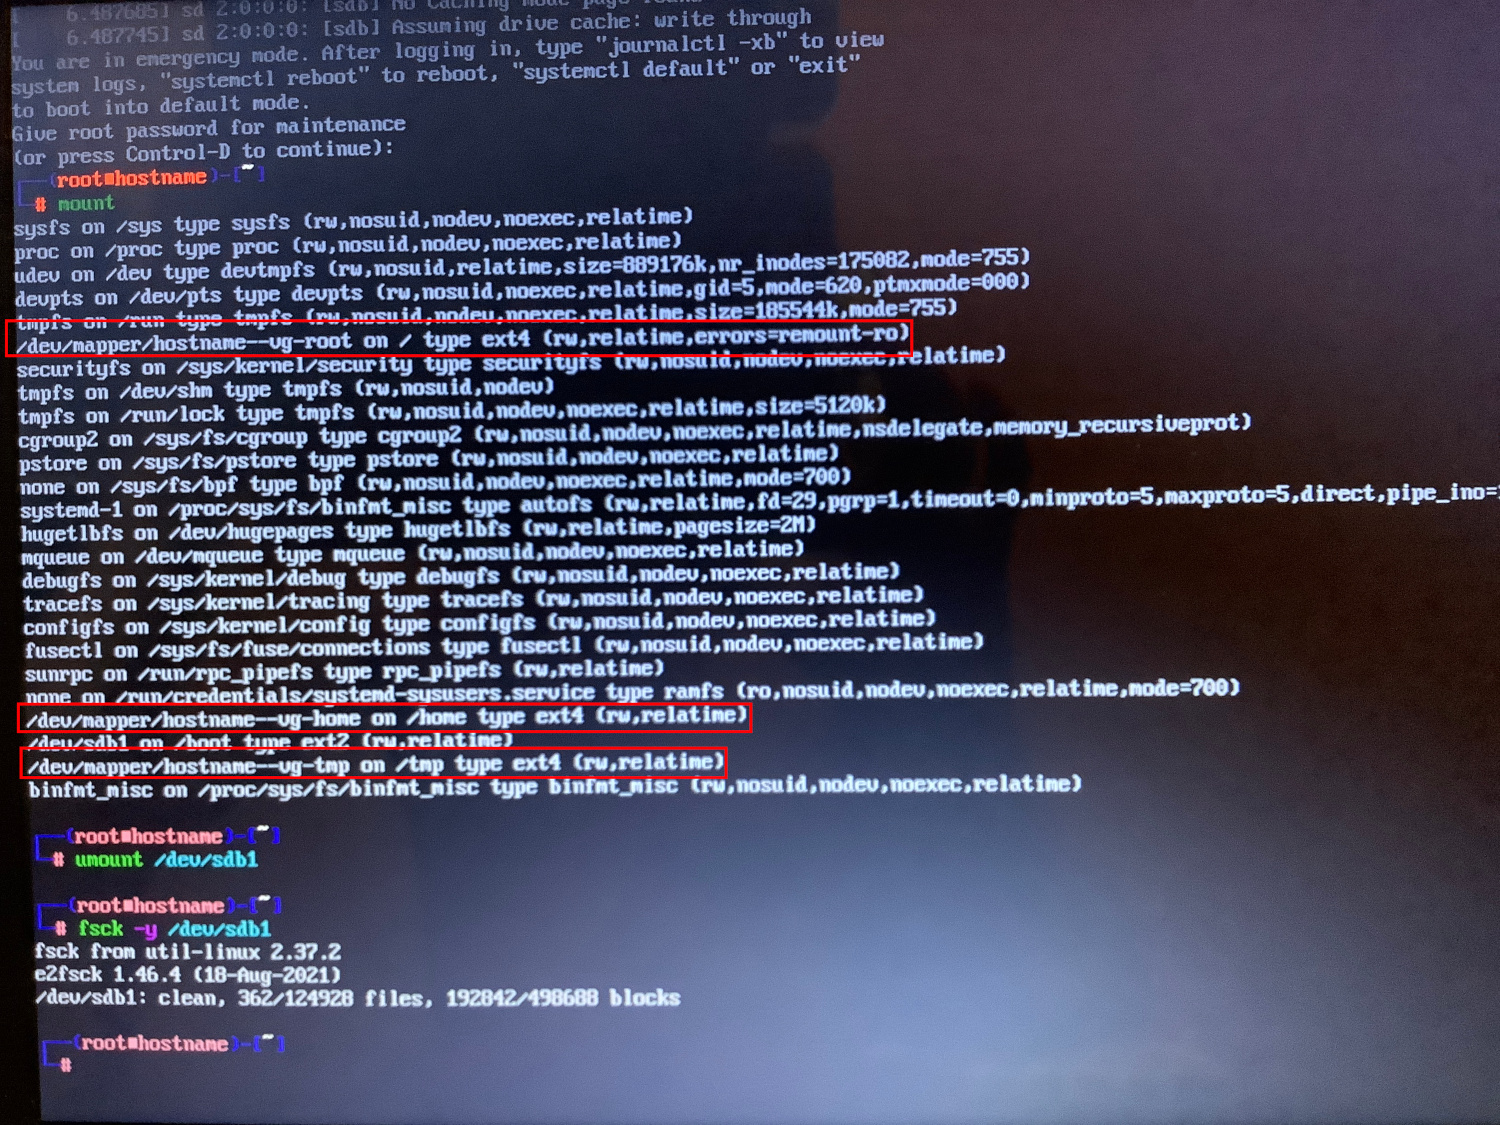
You can determine that the LVM or LVM technology with encryption is used by the entries /dev/mapper/hostname--vg-root and /dev/mapper/hostname--vg-home, which are indicated instead of the partition names in the command output
mount
1. Checking and repairing an unencrypted LVM disk using fdisk
Use the following steps to repair LVM.
First, we check the partitioning of disks with lsblk:
lsblk
Output example:
NAME                 MAJ:MIN RM   SIZE RO TYPE  MOUNTPOINT
sda                    8:0    0    20G  0 disk
└─sda1                 8:1    0    20G  0 part
  └─xubuntu--vg-root 253:0    0    19G  0 lvm   /
sr0                   11:0    1  1024M  0 rom
As you can see, LVM is named xubuntu--vg-root, but we cannot run fsck on that name because the command will not find it. We need to get the full name, for this we need to run the lvm lvscan command to get the LV name with which we can run fsck on LVM.
The following command should be run with elevated privileges (with sudo or as root):
lvscan
Output example:
  inactive          '/dev/xubuntu-vg/root' [<19.04 GiB] inherit
  inactive          '/dev/xubuntu-vg/swap_1' [980.00 MiB] inherit
As you can see, the drive name to check for errors is /dev/xubuntu-vg/root, it should be good enough to run fsck on that name.
If /dev/xubuntu-vg/root root is not ACTIVE, we need to make it active so that we can start checking it.
lvchange -ay /dev/xubuntu-vg/root
It should now look something like this:
sudo lvscan
  ACTIVE            '/dev/xubuntu-vg/root' [<19.04 GiB] inherit
  inactive          '/dev/xubuntu-vg/swap_1' [980.00 MiB] inherit
Now we can run fsck to check the LVM volume:
fsck /dev/xubuntu-vg/root
or run a forced check with automatic error correction:
fsck -fy /dev/xubuntu-vg/root
2. Fix LVM with encryption
It may be that the actions from the previous example are possible only during normal system boot, when all possible utilities are available. Accordingly, in Emergency mode, these operations will fail.
Therefore, let's consider an example of recovering a system from a Live image. The reason for the analyzed problem is that “apt autoremove” command removed the “cryptsetup” package and other utilities important for decryption and normal operation of the partition. This caused the system to stop booting (because the root partition could not be mounted and decrypted using LVM).
If you are not using LVM and full disk encryption, then the probably following is not for you.
In this example, it was possible to fix the system and reinstall cryptsetup and lvm2 in a chroot environment: for this you needed to boot from the Live USB stick, run the following commands in the terminal and reboot
Finding the root partition:
sudo fdisk -l
We decrypt the partition.
sudo cryptsetup open --type luks /dev/nvme0n1p3 nvme0n1p3_crypt
Attention:
- replace /dev/nvme0n1p3 with your own drive
- replace “nvme0n1p3_crypt” with the correct partition name for your computer, you can find it by running the following in the chroot:
cat /etc/crypttab | cut -f1 -d " "
Output example:
nvme0n1p3_crypt
Mounting the root partition
sudo vgscan
sudo vgchange -ay
sudo mount /dev/mapper/xubuntu--vg-root /mnt
Preparing the chroot environment:
sudo mount /dev/nvme0n1p2 /mnt/boot/ # replace nvme0n1p2 with your boot partition!
sudo mount -o rbind /dev/ /mnt/dev/
sudo mount -t proc proc /mnt/proc/
sudo mount -t sysfs sys /mnt/sys/
Make DNS service available in chroot:
sudo cp /etc/resolv.conf /mnt/etc/resolv.conf
Enter the chroot:
sudo chroot /mnt /bin/bash
We reinstall the missing packages:
apt install cryptsetup lvm2
Re-generate (this can be done with the “apt” command in the previous step – if it was already done, then skip):
update-initramfs -u -k all
Leaving the chroot environment:
exit
Let’s write the buffer to disk:
sudo sync
Unmount the file systems:
sudo umount /mnt/sys
sudo umount /mnt/proc
sudo umount /mnt/boot
Related articles:
- How to determine why Linux boots into Emergency mode (100%)
- An unplugged disk causes a delay in system boot (70%)
- Error “Cannot open access to console, the root account is locked” (SOLVED) (68.7%)
- Persistent names for block devices (67.2%)
- “Initramfs unpacking failed: invalid magic at start of compressed archive” error (SOLVED) (59.7%)
- PHP Warning: PHP Startup: imap: Unable to initialize module (SOLVED). How to install the imap module for PHP on Arch Linux (RANDOM - 50%)